Posted on Leave a comment

Introduction to Redis:

Redis is an open-source, in-memory data structure store that can be used as a database, cache, and message broker. It is known for its fast performance, scalability, and flexibility. Redis supports various data structures like strings, hashes, lists, sets, and sorted sets, and it also provides powerful features like pub/sub messaging, transactions, and Lua scripting.

Practical Example:

Let’s say you are building a web application that needs to store session data for logged-in users. You could use Redis to store this data as it provides fast and efficient key-value storage.

To get started, you would first need to install Redis on your machine or server. Once installed, you can start a Redis server by running the following command:

redis-server

Or, if you already have redis-server installed and running you can check it ( and get the running port ) using:

sudo systemctl status redis


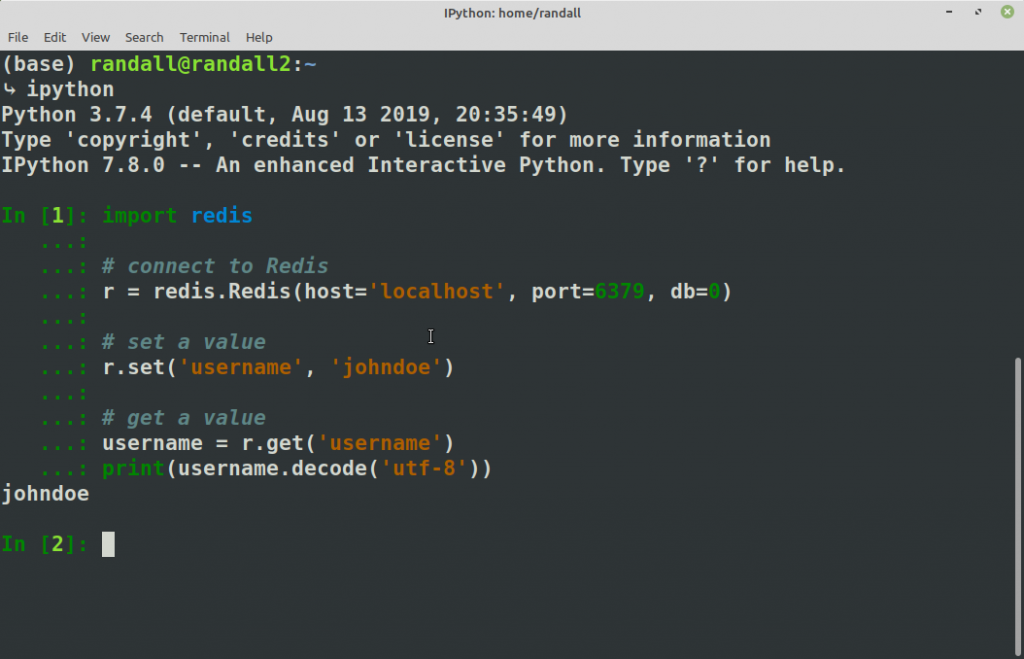
Now, let’s write some code to interact with Redis. Here’s an example in Python using the Redis-py library:

import redis

# connect to Redis
r = redis.Redis(host='localhost', port=6379, db=0)

# set a value
r.set('username', 'johndoe')

# get a value
username = r.get('username')
print(username.decode('utf-8'))

In this example, we connect to Redis using the Redis-py library and set a value for the key ‘username’. We then retrieve the value for that key and print it out.
This is just a simple example, but Redis can be used for much more complex tasks like caching, message queuing, and real-time analytics. With its ease of use and powerful features, Redis is a great tool to have in your toolbox.

Directly interact with Redis using the redis-cli

The remaining examples can be run directly against the redis server using the CLI. Even thou

To start the Redis CLI, open a terminal or shell and enter the following command:

redis-cli

This will open the Redis CLI and connect to a Redis server running on the default host (localhost) and port (6379). If your Redis server is running on a different host or port, you can specify it using the -h and -p options:

redis-cli -h <hostname> -p <port>

Once you are connected to the Redis server, you can start executing Redis commands. For example, to set a key-value pair, you can use the SET command:

127.0.0.1:6379> SET mykey "Hello World"
OK

To retrieve the value of a key, you can use the GET command:

127.0.0.1:6379> GET mykey
"Hello World"

You can also exit the Redis CLI by typing exit or quit.

Note that the Redis CLI is a powerful tool for interacting with Redis, but it may not be the most suitable tool for all use cases. There are many Redis client libraries available for various programming languages that provide more advanced functionality and are better suited for application development.

Modify the Value in a key,value pair.

There a few ways you can modify the value in a key,value pair in situ.

  • SET key value [EX seconds] [PX milliseconds] [NX|XX]:
    Sets the value of a key. If the key already exists, the value is overwritten. If the XX option is used, the command only succeeds if the key already exists. If the NX option is used, the command only succeeds if the key does not already exist. The EX and PX options allow you to set an expiration time for the key.
  • SETRANGE key offset value:
    Sets a substring of the value of a key starting at the specified offset.
  • APPEND key value:
    Appends the specified value to the existing value of a key.
  • INCR key:
    Increments the value of a key by 1.
  • INCRBY key increment:
    Increments the value of a key by the specified increment.
  • DECR key:
    Decrements the value of a key by 1.
  • DECRBY key decrement:
    Decrements the value of a key by the specified decrement.

Here are some examples of setting key-value pairs on Redis using the CLI:

  1. Setting a string value:
127.0.0.1:6379> SET name "John"
OK
  1. Setting a numeric value:
127.0.0.1:6379> SET age 35
OK
  1. Setting multiple key-value pairs at once:
127.0.0.1:6379> MSET city "New York" occupation "Engineer"
OK
  1. Setting a value with an expiration time (in seconds):
127.0.0.1:6379> SET token "mysecrettoken" EX 3600
OK

In this example, the token key is set with a value of "mysecrettoken" and an expiration time of 3600 seconds (1 hour).

  1. Setting a value only if the key does not already exist:
127.0.0.1:6379> SETNX username "johndoe"
(integer) 1

In this example, the SETNX command sets the username key to "johndoe" only if the key does not already exist.

These are just a few examples of setting key-value pairs on Redis using the CLI. You can explore more Redis commands and options using the redis-cli --help command or by consulting the Redis documentation.

Deleting a Key,Value pair

To delete a value in Redis, you can use the DEL command, which removes the specified key and its associated value(s) from the database. The syntax of the DEL command is as follows:

DEL key [key ...]

Where key is the name of the key(s) you want to delete.

Here’s an example of how to delete a key and its value using the DEL command:

> SET mykey "Hello World"
OK
> DEL mykey
(integer) 1
> GET mykey
(nil)

In this example, we first set the value of the key mykey to "Hello World". We then use the DEL command to delete the key and its value from the database. Finally, when we attempt to retrieve the value of mykey using the GET command, we receive a nil response, indicating that the key no longer exists in the database.

It’s important to note that deleting a key is a permanent operation and cannot be undone. Also, be cautious when using the DEL command in production environments to avoid deleting important data accidentally.


Here are 10 more common Redis use cases:

  1. Caching: Redis can be used as a caching layer to store frequently accessed data in memory, reducing the need to make expensive database calls.
  2. Session Store: Redis is commonly used to store session data for web applications, allowing users to remain logged in and maintain their session state.
  3. Pub/Sub Messaging: Redis supports publish/subscribe messaging, allowing different parts of a system to communicate with each other in real-time.
  4. Real-time Analytics: Redis can be used to store and analyze real-time data, making it a powerful tool for real-time analytics and monitoring.
  5. Leaderboards and Rankings: Redis’s sorted set data structure can be used to create leaderboards and rankings in applications.
  6. Task Queues: Redis can be used to implement task queues, allowing for background processing of jobs in a scalable and efficient manner.
  7. Geo-spatial Indexing: Redis supports geo-spatial indexing, allowing you to store and query geo-location data.
  8. Rate Limiting: Redis can be used to implement rate limiting, preventing excessive usage of resources in a system.
  9. Data Structures: Redis provides a variety of data structures like lists, sets, and hashes, allowing for efficient storage and retrieval of structured data.
  10. Full-text Search: Redis supports full-text search using the Redisearch module, making it a useful tool for applications that require advanced search functionality.
Posted on Leave a comment

Allow SSH traffic to an EC2 instance using AWS CLI,

To allow SSH traffic to an EC2 instance using AWS CLI, you need to modify the security group associated with your instance to allow incoming traffic on port 22.

Here are the steps to allow SSH traffic to an instance using AWS CLI:

Step 1: Get the ID of the security group associated with your instance

Run the following command to get the ID of the security group associated with your instance:

aws ec2 describe-instances --instance-ids <instance-id> --query 'Reservations[].Instances[].SecurityGroups[].GroupId' --output text --region <region>

Replace <instance-id> with the ID of your instance, and <region> with the region where your instance is located.

Step 2: Update the security group inbound rules to allow SSH traffic

Run the following command to update the security group inbound rules and allow SSH traffic:

aws ec2 authorize-security-group-ingress --group-id <security-group-id> --protocol tcp --port 22 --cidr <ip-address>/32 --region <region>

Replace <security-group-id> with the ID of the security group associated with your instance, <ip-address> with the IP address range that you want to allow SSH traffic from (e.g., your local IP address), and <region> with the region where your instance is located.

This command will add an inbound rule to the security group to allow incoming TCP traffic on port 22 from the specified IP address range.

Step 3: Verify the security group inbound rules

Run the following command to verify that the inbound rules of the security group have been updated correctly:

aws ec2 describe-security-groups --group-ids <security-group-id> --query 'SecurityGroups[].IpPermissions[]' --region <region>

Replace <security-group-id> with the ID of the security group associated with your instance, and <region> with the region where your instance is located.

This command will display the inbound rules of the security group, including the new rule that you added to allow SSH traffic.

By updating the security group inbound rules to allow incoming SSH traffic on port 22, you should be able to connect to your instance using SSH. Remember to remove the inbound rule once you have finished your SSH session for security purposes. You can remove the inbound rule using the revoke-security-group-ingress command with similar parameters as the authorize-security-group-ingress command above.

Posted on Leave a comment

Associate Public IP with an EC2 Instance

Here’s how to associate an Elastic IP address with an EC2 instance using AWS CLI:

Step 1: Allocate an Elastic IP address

First, allocate an Elastic IP address using the allocate-address command:

aws ec2 allocate-address --region <region>

Replace <region> with the region where you want to allocate the Elastic IP address. This command will allocate a new Elastic IP address and return the IP address in JSON format.

Step 2: Associate the Elastic IP address with your instance

Next, associate the Elastic IP address with your EC2 instance using the associate-address command:

aws ec2 associate-address --instance-id <instance-id> --public-ip <public-ip> --region <region>

Replace <instance-id> with the ID of the EC2 instance that you want to associate the Elastic IP address with, <public-ip> with the Elastic IP address that you allocated in Step 1, and <region> with the region where your EC2 instance is located.

This command will associate the Elastic IP address with your EC2 instance, making it reachable from the internet.

Step 3: Verify the association

You can verify that the Elastic IP address is associated with your EC2 instance by using the describe-instances command:

aws ec2 describe-instances --instance-ids <instance-id> --query 'Reservations[].Instances[].PublicIpAddress' --output text --region <region>

Replace <instance-id> with the ID of the EC2 instance that you associated the Elastic IP address with, and <region> with the region where your EC2 instance is located. This command will output the public IP address of your EC2 instance, which should match the Elastic IP address that you associated with it.

By associating an Elastic IP address with your EC2 instance using AWS CLI, you can add a public facing network to your instance and make it reachable from the internet.

Posted on Leave a comment

Creating KeyPairs with AWS CLI

To create a key pair using AWS CLI, you can use the aws ec2 create-key-pair command. Here’s how to do it:

Step 1: Open the AWS CLI

First, open the AWS CLI on your local machine or a remote server. You can do this by opening a terminal window and typing aws in the command prompt.

Step 2: Create a key pair

To create a new key pair, use the following command:

aws ec2 create-key-pair --key-name <key_name> --query 'KeyMaterial' --output text > <key_name>.pem

Replace <key_name> with a unique name for your key pair. This will be the name that you use to identify the key pair when launching EC2 instances.

This command will create a new key pair with the specified name and output the private key to a file with the same name as the key pair, but with a .pem extension. The private key file will be saved in the current working directory.

Step 3: Set permissions on the private key file

Before you can use the private key file to connect to an EC2 instance, you need to set the correct permissions on the file. Use the following command to set the permissions:

chmod 400 <key_name>.pem

Replace <key_name> with the name of your key pair.

Step 4: Verify the key pair

You can verify that the key pair was created successfully by using the following command:

aws ec2 describe-key-pairs --key-names <key_name>

This command will display information about the key pair, including the fingerprint of the public key.

That’s it! You have successfully created a key pair using AWS CLI. You can now use this key pair to launch EC2 instances and connect to them using SSH.

Posted on Leave a comment

How to install the Amazon AWS CLI on Linux Mint.

Before we begin, make sure that your system is up to date by running the following commands in the terminal:

sudo apt-get update
sudo apt-get upgrade

Now let’s move on to the installation process.

Step 1: Install pip

The AWS CLI requires Python and pip to be installed on your system. If you don’t have pip installed, you can install it using the following command:

sudo apt-get install python3-pip

Step 2: Install the AWS CLI

Once you have pip installed, you can install the AWS CLI using the following command:

pip3 install awscli --upgrade --user

This command will download and install the latest version of the AWS CLI.

Step 3: Verify the installation

To verify that the installation was successful, you can run the following command:

aws --version

This command will display the version number of the AWS CLI installed on your system.

Step 4: Configure the AWS CLI

After the installation is complete, you need to configure the AWS CLI to access your AWS account. To do this, run the following command:

aws configure

This command will prompt you to enter your AWS access key ID, secret access key, default region name, and default output format. You can find your access key ID and secret access key in the AWS Management Console.

Once you have entered this information, the AWS CLI is ready to use.

That’s it! You have successfully installed the AWS CLI on Linux Mint and configured it to access your AWS account. You can now use the CLI to manage your AWS resources from the command line.

Posted on Leave a comment

Installing and Setting Up Jenkins CI/CD on Linux Mint

Introduction:

Jenkins is an open-source automation server that helps automate parts of the software development process. With Jenkins, you can set up continuous integration and continuous deployment (CI/CD) for your projects, making it easier to build, test, and deploy applications. This guide will walk you through the process of installing and setting up Jenkins on Linux Mint

Prerequisites:

  • Linux Mint system
  • A user with sudo privileges
  • An internet connection

Step 1: Update Your System

Before installing Jenkins, it’s essential to update your system packages to their latest versions. To do this, open a terminal and run the following commands:

sudo apt update
sudo apt upgrade

Step 2: Install Java Development Kit (JDK)

Jenkins requires Java to run, so you will need to install the Java Development Kit (JDK). In this guide, we will use OpenJDK 11. Install OpenJDK 11 by running the following command:

sudo apt install openjdk-11-jdk

Verify the installation by checking the Java version:

java -version

Step 3: Add Jenkins Repository

Jenkins provides a dedicated repository for its packages. To add this repository to your system, first, install the necessary dependencies by running:

sudo apt install wget apt-transport-https gnupg

Next, import the GPG key for the Jenkins repository:

wget -q -O - https://pkg.jenkins.io/debian/jenkins.io.key | sudo gpg --dearmor -o /usr/share/keyrings/jenkins-archive-keyring.gpg

Now, add the Jenkins repository to your system:

echo "deb [signed-by=/usr/share/keyrings/jenkins-archive-keyring.gpg] https://pkg.jenkins.io/debian binary/" | sudo tee /etc/apt/sources.list.d/jenkins.list

Update the package list to include the Jenkins repository:

sudo apt update

Step 4: Install Jenkins

With the repository added, you can now install Jenkins by running:

sudo apt install jenkins

Step 5: Start and Enable Jenkins Service

Once Jenkins is installed, start the Jenkins service and enable it to run at system startup:

sudo systemctl start jenkins
sudo systemctl enable jenkins

Verify that Jenkins is running:

sudo systemctl status jenkins

Step 6: Configure Firewall ( optional for local install )

If you have a firewall enabled, you will need to allow traffic on port 8080, which is the default port Jenkins listens on. In this guide, we will use the UFW (Uncomplicated Firewall) to configure the firewall. If you don’t have UFW installed, you can install it by running:

sudo apt install ufw

Allow traffic on port 8080:

sudo ufw allow 8080

Step 7: Set Up Jenkins

Access the Jenkins web interface by opening a web browser and navigating to:

http://your_server_ip_or_domain:8080

You will be prompted for an unlock key. Retrieve the key by running:

sudo cat /var/lib/jenkins/secrets/initialAdminPassword

Copy the key and paste it into the web interface. Click “Continue” to proceed with the setup.

You will be presented with two options for plugin installation: “Install suggested plugins” and “Select plugins to install.” Choose the option that best suits your needs.

Create an admin user by providing a username, password, and email address. Click “Save and Continue” to proceed. Review the Jenkins URL and ensure that it is correct. Click “Save and Finish” to complete the setup.

Step 8: Accessing Jenkins Dashboard

You will now be redirected to the Jenkins dashboard. From here, you can create and manage jobs, install plugins, configure system settings, and monitor the status of your builds.

Conclusion:

You have successfully installed and set up Jenkins on Linux Mint 20. You can now start exploring Jenkins features and plugins to create your continuous integration and continuous deployment pipelines. With Jenkins, you can automate your software development processes, making it easier and more efficient to build, test, and deploy applications.

Posted on Leave a comment

Building a City Lookup Tool

React, React Query, and Django

Introduction:

In this tutorial, we’ll walk through creating a form that lets users select a state, county, and town using React, React Query, and Django as a backend. React will be used for building the frontend user interface, React Query for fetching and managing server-side data, and Django to create the backend API.

Prerequisites:

  • Basic understanding of React, React Query, and Django
  • Node.js and npm/yarn installed on your system
  • Python and Django installed on your system
  • Django Rest Framework ( install with pip )

Step 1: Setting up the Django Backend

1.1. Create a new Django project and app:

$ django-admin startproject myproject
$ cd myproject
$ python manage.py startapp myapp

1.2. In myapp/models.py, create the State, County, and Town models:

from django.db import models

class State(models.Model):
    name = models.CharField(max_length=100)

class County(models.Model):
    name = models.CharField(max_length=100)
    state = models.ForeignKey(State, on_delete=models.CASCADE)

class Town(models.Model):
    name = models.CharField(max_length=100)
    county = models.ForeignKey(County, on_delete=models.CASCADE)

1.3. Add ‘myapp’ to the INSTALLED_APPS in myproject/settings.py.

1.4. Run migrations to create the database schema:

$ python manage.py makemigrations
$ python manage.py migrate

1.5. Create serializers for the models in myapp/serializers.py:

from rest_framework import serializers
from .models import State, County, Town

class StateSerializer(serializers.ModelSerializer):
    class Meta:
        model = State
        fields = '__all__'

class CountySerializer(serializers.ModelSerializer):
    class Meta:
        model = County
        fields = '__all__'

class TownSerializer(serializers.ModelSerializer):
    class Meta:
        model = Town
        fields = '__all__'

1.6. Create views in myapp/views.py:

from rest_framework import generics
from .models import State, County, Town
from .serializers import StateSerializer, CountySerializer, TownSerializer

class StateList(generics.ListAPIView):
    queryset = State.objects.all()
    serializer_class = StateSerializer

class CountyList(generics.ListAPIView):
    serializer_class = CountySerializer

    def get_queryset(self):
        state_id = self.kwargs['state_id']
        return County.objects.filter(state_id=state_id)

class TownList(generics.ListAPIView):
    serializer_class = TownSerializer

    def get_queryset(self):
        county_id = self.kwargs['county_id']
        return Town.objects.filter(county_id=county_id)

1.7. Configure the API URLs in myapp/urls.py:

from django.urls import path
from . import views

urlpatterns = [
    path('states/', views.StateList.as_view(), name='state_list'),
    path('states/<int:state_id>/counties/', views.CountyList.as_view(), name='county_list'),
    path('counties/<int:county_id>/towns/', views.TownList.as_view(), name='town_list'),
]

1.8. Include the app URLs in the project’s urls.py:

from django.contrib import admin
from django.urls import path, include

urlpatterns = [
    path('admin/', admin.site.urls),
    path('api/', include('myapp.urls')),
]

Step 2: Setting up the React Frontend

2.1. Create a new React project using Create React App:

$ npx create-react-app myapp-frontend
$ cd myapp-frontend

2.2. Install the necessary dependencies:

$ npm install axios react-query

2.3. Replace the contents of src/App.js with the following:

import React, { useState } from "react";
import { useQuery } from "react-query";
import axios from "axios";

const fetchStates = async () => {
  const { data } = await axios.get("/api/states/");
  return data;
};

const fetchCounties = async (stateId) => {
  const { data } = await axios.get(`/api/states/${stateId}/counties/`);
  return data;
};

const fetchTowns = async (countyId) => {
  const { data } = await axios.get(`/api/counties/${countyId}/towns/`);
  return data;
};

function App() {
  const [selectedState, setSelectedState] = useState(null);
  const [selectedCounty, setSelectedCounty] = useState(null);

  const { data: states } = useQuery("states", fetchStates);

  const { data: counties } = useQuery(
    ["counties", selectedState],
    () => fetchCounties(selectedState),
    { enabled: !!selectedState }
  );

  const { data: towns } = useQuery(
    ["towns", selectedCounty],
    () => fetchTowns(selectedCounty),
    { enabled: !!selectedCounty }
  );

  return (
    <div className="App">
      <h1>Location Selector</h1>
      <select
        value={selectedState}
        onChange={(e) => {
          setSelectedState(e.target.value);
          setSelectedCounty(null);
        }}
      >
        <option value="">Select State</option>
        {states?.map((state) => (
          <option key={state.id} value={state.id}>
            {state.name}
          </option>
        ))}
      </select>

      {selectedState && (
        <select
          value={selectedCounty}
          onChange={(e) => setSelectedCounty(e.target.value)}
        >
          <option value="">Select County</option>
          {counties?.map((county) => (
            <option key={county.id} value={county.id}>
              {county.name}
            </option>
          ))}
        </select>
      )}

      {selectedCounty && (
        <select>
          <option value="">Select Town</option>
          {towns?.map((town) => (
            <option key={town.id} value={town.id}>
              {town.name}
            </option>
          ))}
        </select>
      )}
    </div>
  );
}

export default App;

In the code above, we create the App component, import the necessary dependencies, and define three functions to fetch states, counties, and towns from the API. We then use React Query’s useQuery hook to fetch the data and store it in the component’s state. Based on the user’s selection of state and county, we conditionally render the county and town dropdown menus.

Step 3: Configure Proxy for the Development Server

To avoid CORS issues while making API requests from the frontend, add a proxy to the development server. In myapp-frontend/package.json, add the following line:

"proxy": "http://localhost:8000",

This will proxy requests made by the development server to the Django back-end running on port

Step 4: Run the Application

There is some additional code if you are running bot the Django Server and the React Server ( as below )

Make sure you have react-query installed

npm install react-query

Modify your index.js

Add an import at the beginning of your index.js

import { QueryClient } from 'react-query';

Add a new instance below the imports ( in the index.js file )

const queryClient = new QueryClient();

Wrap your ‘App’ in the QueryClient ( in the index.js file )

  <QueryClientProvider client={queryClient}>
    <App />
  </QueryClientProvider>,

You index.js should now look like this:

import React from 'react';
import ReactDOM from 'react-dom/client';
import './index.css';
import App from './App';
import reportWebVitals from './reportWebVitals';
import { QueryClient, QueryClientProvider } from 'react-query';

const root = ReactDOM.createRoot(document.getElementById('root'));
const queryClient = new QueryClient();

root.render(
  <React.StrictMode>
    <QueryClientProvider client={queryClient}>
      <App />
    </QueryClientProvider>,
  </React.StrictMode>
);

// If you want to start measuring performance in your app, pass a function
// to log results (for example: reportWebVitals(console.log))
// or send to an analytics endpoint. Learn more: https://bit.ly/CRA-vitals
reportWebVitals();

4.1. Start the Django development server:

In the myproject directory, run the following command:

$ python manage.py runserver

This will start the Django development server on http://localhost:8000.

4.2. Start the React development server:

In the myapp-frontend directory, run the following command:

$ npm start

This will start the React development server, which will automatically open your default web browser and navigate to http://localhost:3000.

Now you should see the form with the state, county, and town dropdown menus. As you select a state and county, the corresponding counties and towns will be fetched and populated in the respective dropdowns.

Conclusion:

In this tutorial, we have demonstrated how to create a form with state, county, and town dropdowns using React, React Query, and Django. We utilized Django as our backend to serve the API, React to build the user interface, and React Query to manage data fetching and state management. This combination of technologies allows for a seamless and performant user experience while managing complex data dependencies.

Posted on Leave a comment

RaspberryPi – Keyboard and Mouse Sharing 2

How to start the Keyboard and Mouse sharing tool Barrier from a SSH Command line.

Nothing is worse than having your Keyboard and Mouse sharing working but having to USB swap your keyboard when, for some reason or another, your Barrier install disconnects. With a few pieces of knowledge, you can ditch the second Keyboard and never USB swap again.

Pre-Requisites

  • ssh server running on the target RaspberryPi
  • Ability to login as the same user running the desktop on your RasberryPi
  • barrier installed on both machines.

Bare Bones Attempt

If all is well on your systems, this “might” work. Each line is a command. You will have to take the IP address from line 2 and plug it in to line 4 where you see my IP.

barrier
hostname -I
ssh pi@raspberrypi
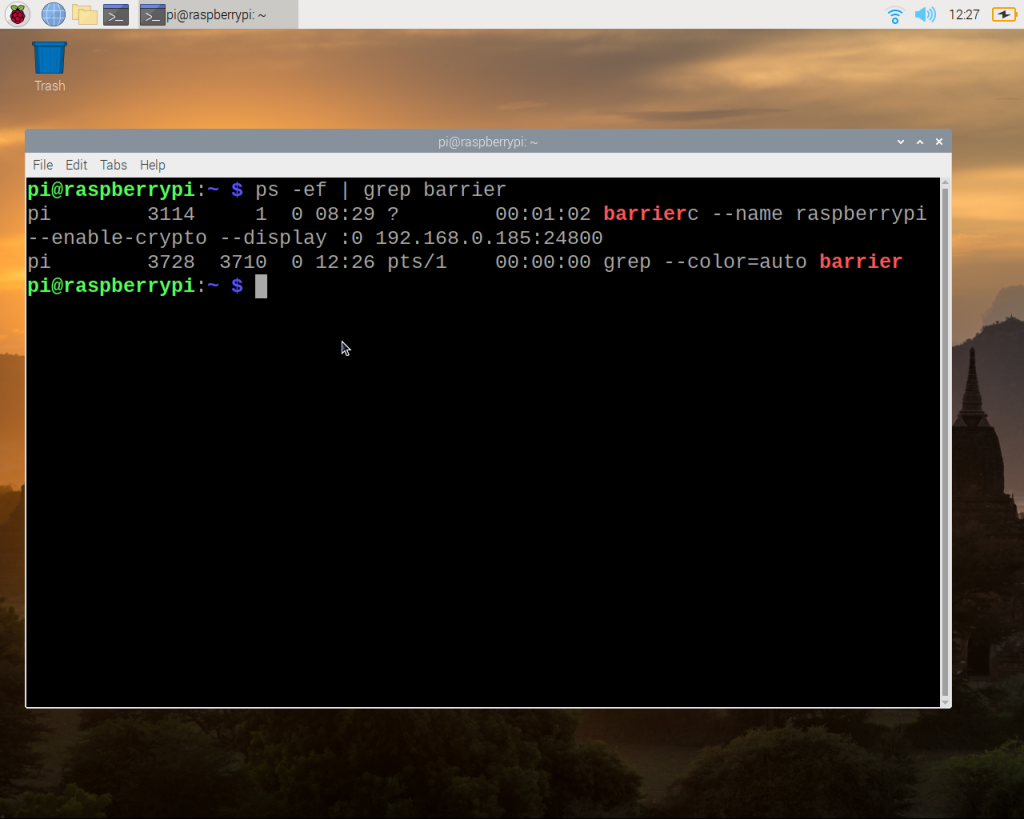
barrierc --name raspberrypi --enable-crypto --display :0 192.168.0.185:24800

barrier, barrierc, barriers

The barrier tool is in actuality multiple programs.

barrier – A “wrapper” that runs th GUI

barrierc – The Barrier client

barriers – The Barrier server

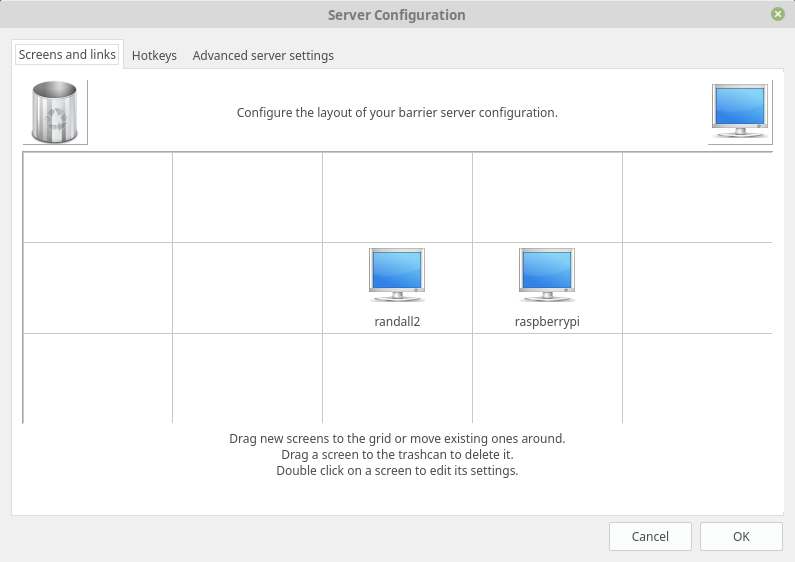
The barrier command does not have an command line ability and simply launches the GUI which in turn launches the client or server as per chosen options. We will run the barrier client on the raspberry pi

To begin SSH to your RaspberryPi, it should looks something like this:

ssh pi@192.168.0.100

Identify the Client “Screen”

RaspberryPi runs a system called X. In order to connect the client to the proper desktop display we need to get something known as the display number. We can use the command w to get this information. Simply type W at the command line

pi@raspberrypi:~ $ w
 11:37:04 up  6:24,  3 users,  load average: 0.04, 0.10, 0.09
USER     TTY      FROM             LOGIN@   IDLE   JCPU   PCPU WHAT
pi       tty7     :0               08:19    6:24m 39.88s  1.03s /usr/bin/lxsess
pi       tty1     -                07:04    4:31m  1.38s  0.51s -bash
pi       pts/0    192.168.0.185    11:35    0.00s  0.58s  0.04s w
pi@raspberrypi:~ $ 

The two most important pieces of information are from the columns USER and FROM

We want the first entry in the list, it is the user on tty7, user pi, you can see it is connected to the display :0 under the FROM column. This is why we used pi from ssh, to guarantee we have the same permission and access to the screen.

Let’s see the command and breakdown each option.

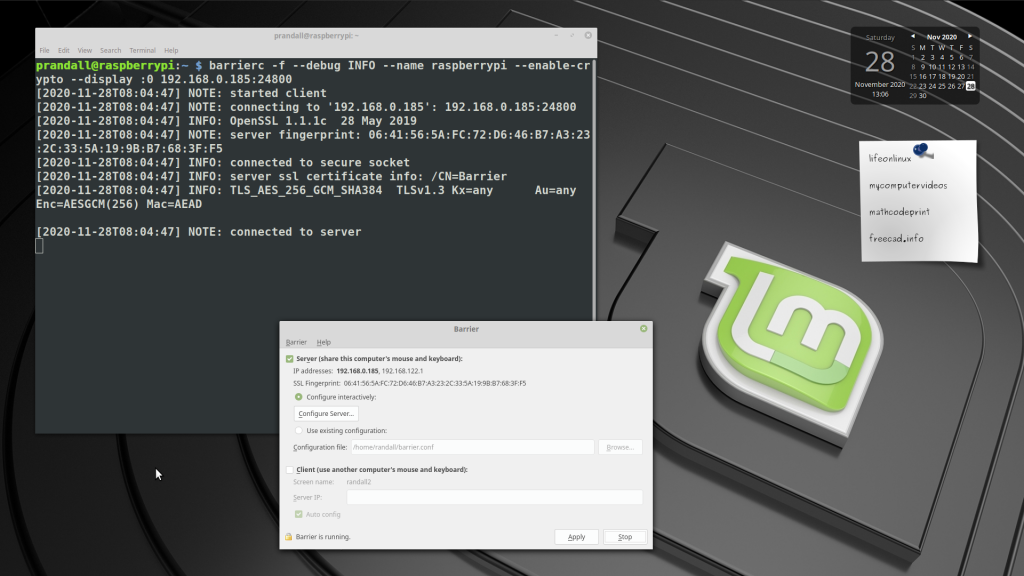
barrierc -f –debug INFO –name raspberrypi –enable-crypto –display :0 192.168.0.185:24800

barrierc – This is client binary

-f

Runs the command in the foreground, useful for getting things going so we can kill the client easily.

–debug INFO

provides information about what is happening, feedback.

–name raspberrypi

This is the name that you must add on the server config

–enable-crypto

The transmission of the mouse and keyboard data should be encrypted to avoid interception. The server is enabled by default and you will not be able to connect the client without this turned on.

–display :0

This is the X-Server display number the client is going to control keyboard and mouse for. This is the key difference when executing a graphically element from a desparate console. The barrierc program needs to be told what Desktop it is going to work with.

Normally the barrierc program is executed from within the desktop/windowing system that it is targeting so you don’t need to tell it, but as we are starting it remotely we need indicate the display number.

192.168.0.185:24800

Barrier Server IP and Port Number

Posted on Leave a comment

If you have not learned systemctl, you need to!

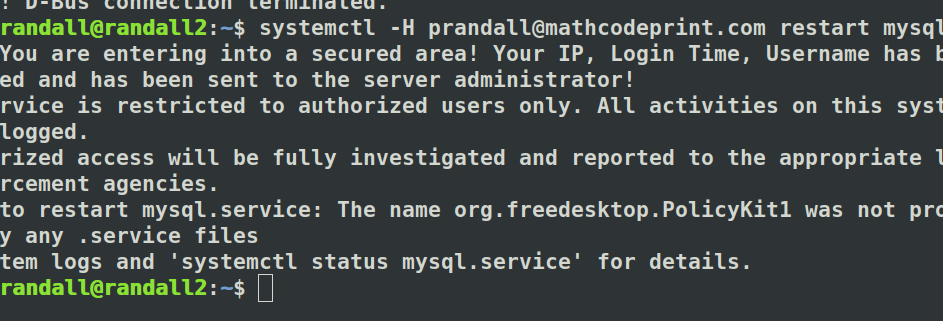
My server for this machine is low memory and the msyql piece craps out all the time. At this point when the site is unresponsive, I don’t even question what the issue will be. One command later and it is running again. After a largely useless legal warning.

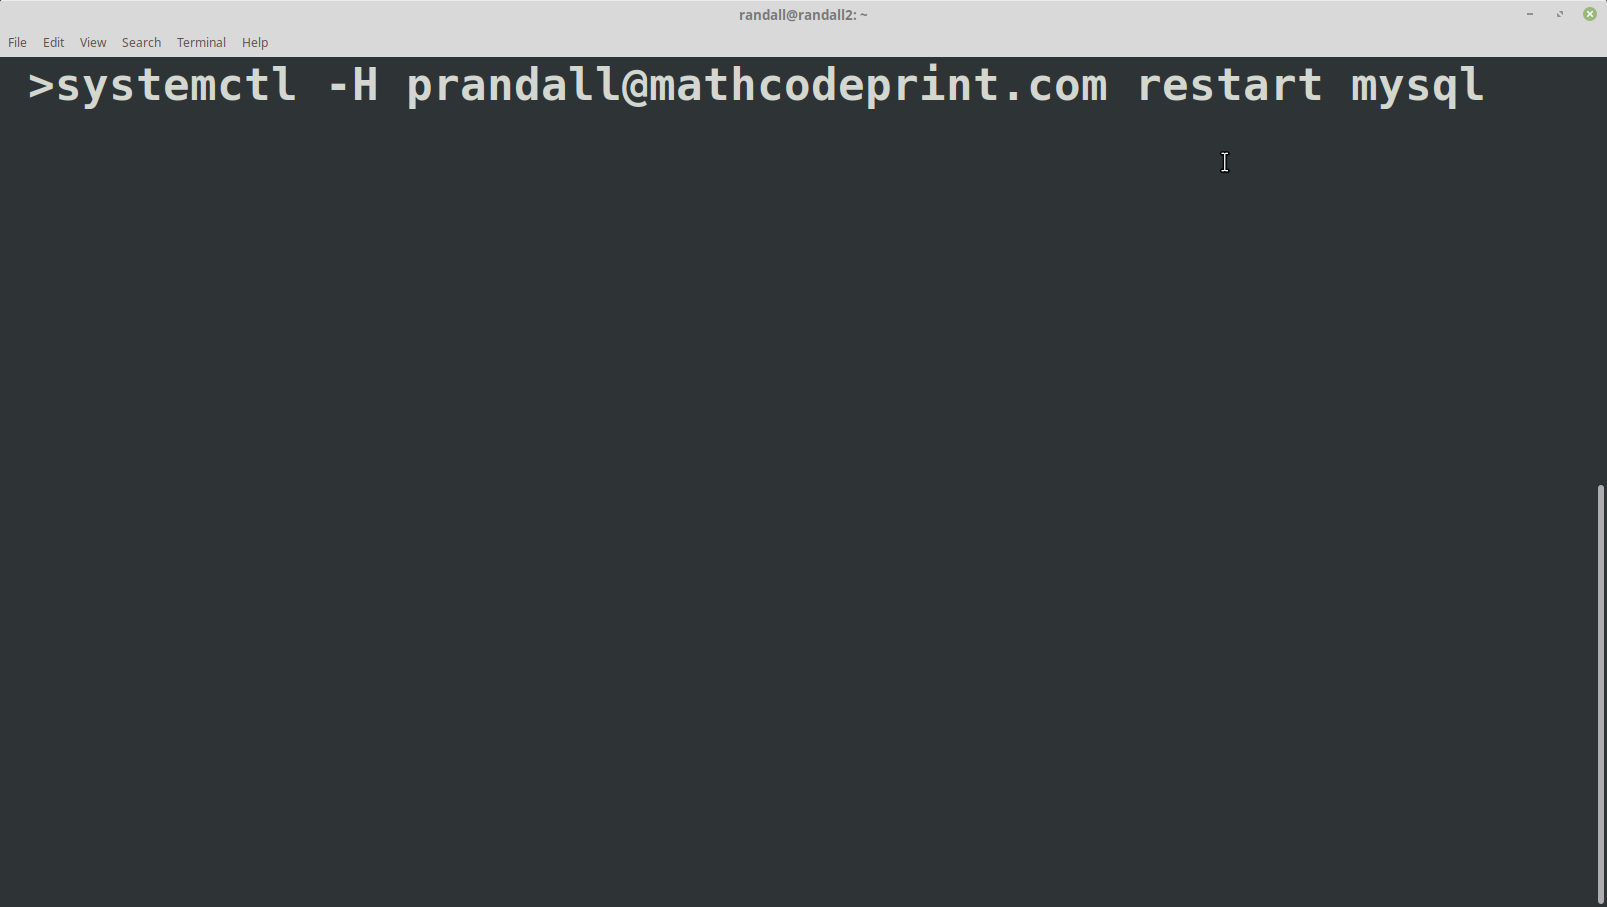
Here is the magic command:

systemctl -H prandall@mathcodeprint.com restart mysql

The -H is the magic. This new service controller for system has built in ssh-ing abilities. You will need to provide a password if you have not set up your private keys.

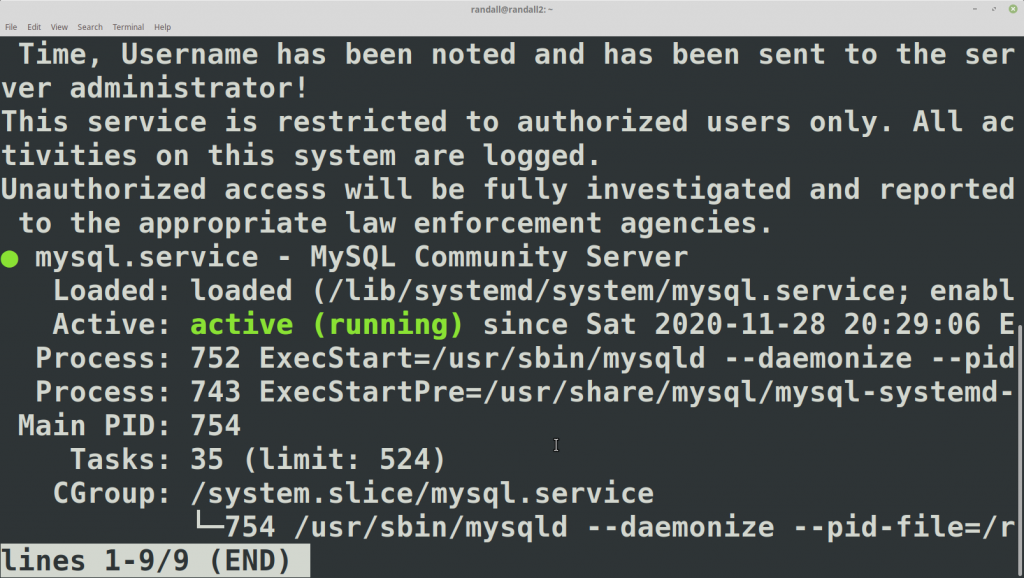
And if I need to check up on the service, same command just with status:

systemctl -H prandall@mathcodeprint.com status mysql

For reference the old process would have been

ssh prandall@mathcodeprint.com
password
service mysql restart
exit

I know it doesn’t seem like a lot but, some of you will understand.

Posted on Leave a comment

WordPress Next Stage Social Sharing – Using AddToAny alongside Jetpack.

In my previous post, I walked through a description of the built-in sharing provided by Jetpack. Jetpack adds sharing directly to the publishing workflow. It also adds some helpful preview features. What it lacks is a large selection of social media sites.

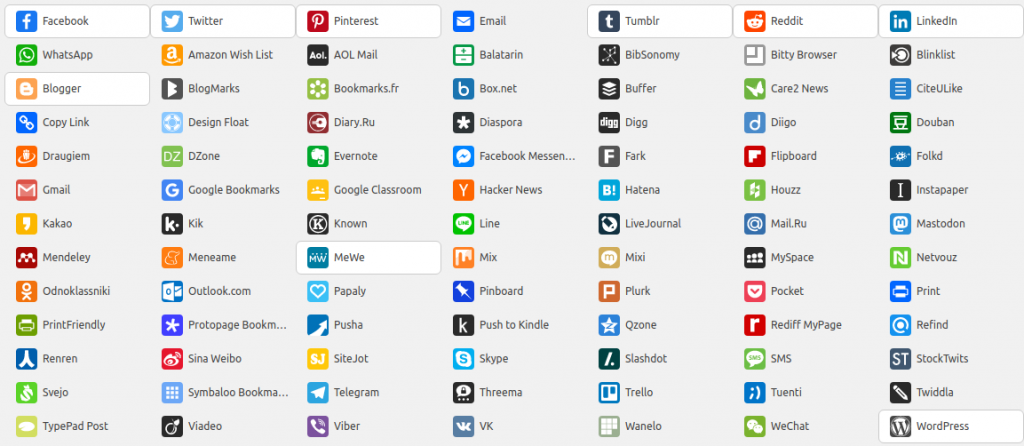
To compensate I have added AddToAny as part of my must-have plugins. AddToAny provides easy to use icons for many Social Sharing websites. In particular, I was looking for a plugin that included MeWe, and AddToAny did not disappoint.

Jetpack automates my most prominent social sites, with AddToAny I need to click on the link and manually share, but add2any makes this a seamless process with only a few clicks.

The setup is very straight forward with a large number of services to choose from. You can activate each service with a single click.

I chose a handful of common services

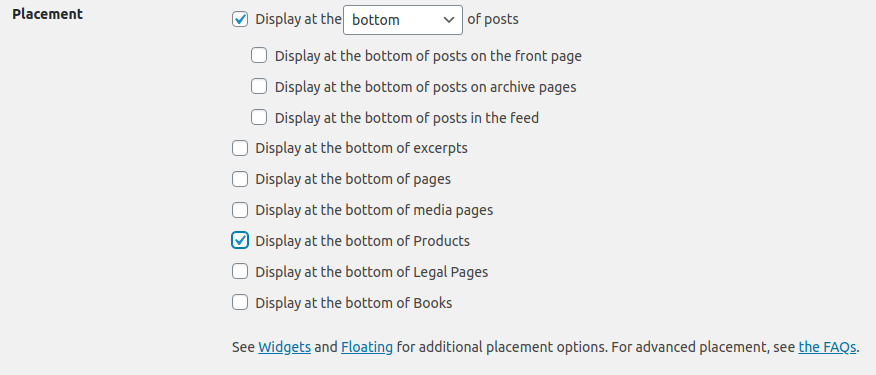
There are a significant number of display options. I have it set only for posts.

If you are looking to get direct follows from your Website Add2Any includes a follow widget for users of your website to click. The widget includes additional services like Instagram, YouTube, and others:

AddToAny is a very popular add on and a great addition to your arsenal of tools.