I wanted a tool to quickly show me some of the basic things I needed to work on to harden the security on the various servers I am running. A sort of security checklist. The first tool I have been trying out is the community version of Lynis, and I have enjoyed it so far. With a “Hardeining index” from 1-100, it gives me a great indicator of how I am progressing.
Once installed ( and they have detailed install instructions for many systems ) it is as easy as a single command to get you started:
lynis audit system
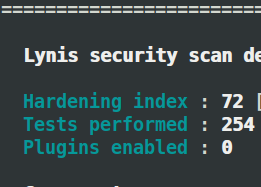
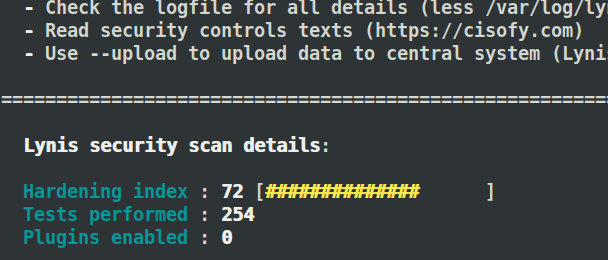
you will get a giant ( not too giant ) list of the status of your system and actionable items.
For my scan I fixed a few things moving from 66 to 72 in my first hardening session.
Running a Low Traffic Website on a Low-End server is a great way to learn. Constrained resources necessitate careful planning of your services. In my journey to keep MySQL from crashing due to memory constraints, these two items fixed the problem.
I manage my own web site ( this site ) as a means to learn and grow my technical know-how. It does not generate any revenue, yet. As a result, I spend the least amount of money on it as possible resulting in the most anemic server. At the writing of this article, my site was slowing to a crawl and MySQL was regularly crashing. Inspecting the processes that where running I found that kswapd, the swap file daemon, was chewing on 50% of my CPU time. It was time for a beginner’s lesson in resource management.
Put MySQL on a Diet
WordPress uses MyISAM as the default storage mechanism. On my distribution InnoDB is included in the default setup. It is not needed for WordPress. As I am only running WordPress on this server I decided to remove InnoDB and free up some memory.
To remove InnoDB support you will need to find your mysql.cnf. More specifically you will need to find the instance that is being used by MySQL. I am running Ubuntu 18.x on my server. Ubuntu is a Debian based system so my configuration file is located here:
/etc/mysql/mysql.conf.d
The MySQL configuration file uses sections denoted with brackets []. For example., there are two sections one name [mysqld_safe] and one called [mysqld]. The sections are completed at the start of the next section.
Place the following command anywhere after the [mysqld] but before the next []
ignore-builtin-innodb
You can now restart the MySQL service with one of the following commands:
service mysql restart
systemctl restart mysql
sudo /etc/init.d/mysql start
Break up the Apache Party
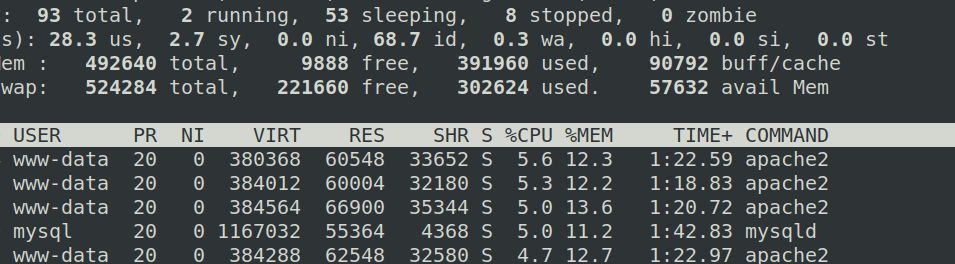
When I checked in on Apache using the command top.I had 26 processes running for Apache. My website just simply isn’t popular and not so important that it needs that much attention. The spammers and search engine bots can wait. Maybe someday I will need more resources for connections but not today.
With the version of Apache2 I am running on a Debian based system the configuration can be found in the mods-available sub-directory. However is you work from the mods-enabled directory you will see a smaller sub-set of choices. You will also answer the question of whether or not the mod you are configuring is actually enabled simply by seeing it in the directory.
To tame Apache bring up the configuration file in your favorite editor, mine nano.
I changed the following to lines to experiment on performance:
   MaxSpareServers          8
   MaxRequestWorkers       10
Squeeking in under the wire
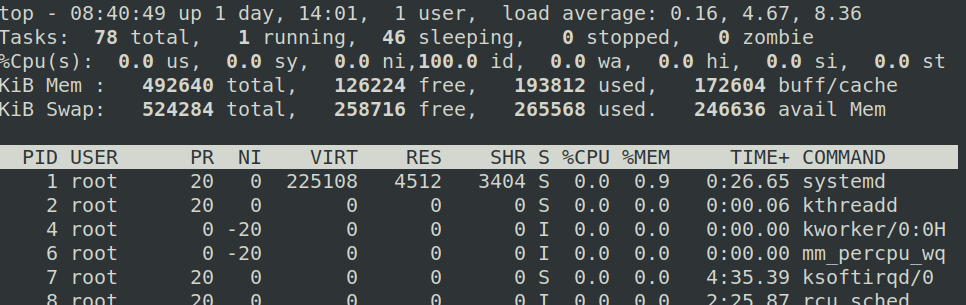
These two tasks have moved my server sentiment from annoying to hopeful. This micro-server now sits just below the meager physical memory limit imposed by it’s $3.00 budget. Take a look at my output from top.
I am just getting by with a teeny bit of left-over space. The key bit is kswapd has calmed down and now MySQL is no longer crashing. It may be short-lived but it is a victory for today.
Update 1:
Had to up the MaxRequestWorkers to 25, pages kept timing out.
Update 2:
Trying to find the lowest number of “Starting” and “Spare” servers I can get away with. Starting with one and having three spare.
Update3: Final Update
Looks like I have tamed the beast. I am now sitting at about 100mb free space. The final step was deactivating WordPress Plugins I did not need. I am very glad it worked as I was about to start dis-abling Apache2 mods that WordPress does not use and I am fairly ignorant on that subject, for now.
For me, docker-compose is a case study in the right tool for the right job. At the least, it allows us to carefully manage and maintain the instancing of our containers. docker-compose takes the command-line options for docker and places them into configuration files.
From a basic understanding of Docker, it becomes clear that it is extremely useful to house your WordPress installation inside a Docker container. Once completed your WordPress instance becomes highly portable and scalable. Additionally, there are other hidden benefits.
Docker is incredibly simple to install and get started. We will be installing the repository version on Linux Mint. This installation should work on any Debian system.
Working on manual backup of my WordPress site I developed a very simple approach to migrate the WordPress database user along with their password. This can be used on any or multiple users of the database.
Requirements
A MySQL server with the user you want to copy to the backup
A working installation of MySQL Workbench
Server Connection to Source ( web-server for the source )
MySQL Server connection to target ( localhost in my case )
Getting the user with CREATE Statement
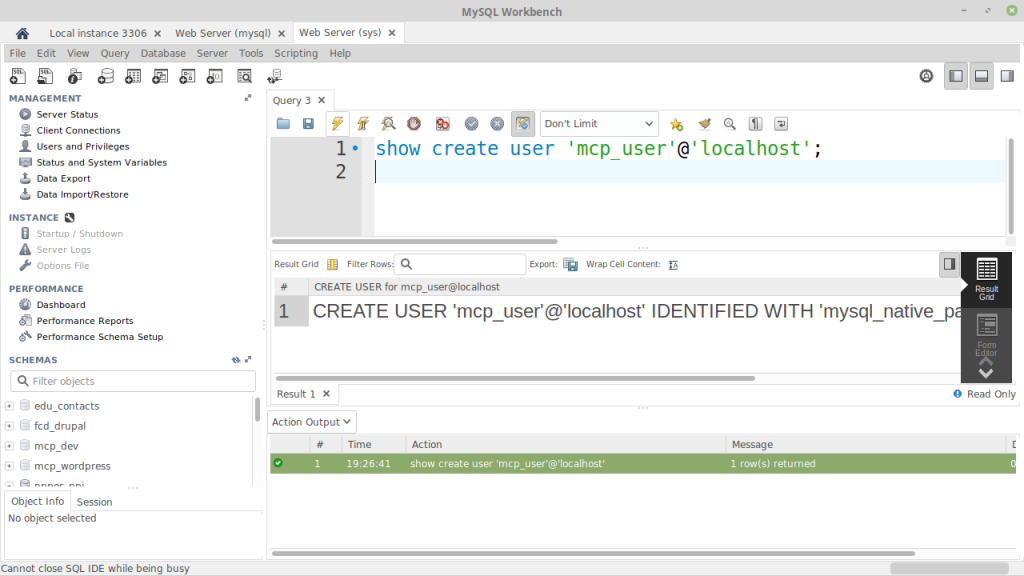
From the source database open a new query and enter the following SQL: Replace mcp_user with the user you would like to migrate.
show create user 'mcp_user'@'localhost';
First, using the MySQL Workbench connect to the source that has your user.
It should look something like this:
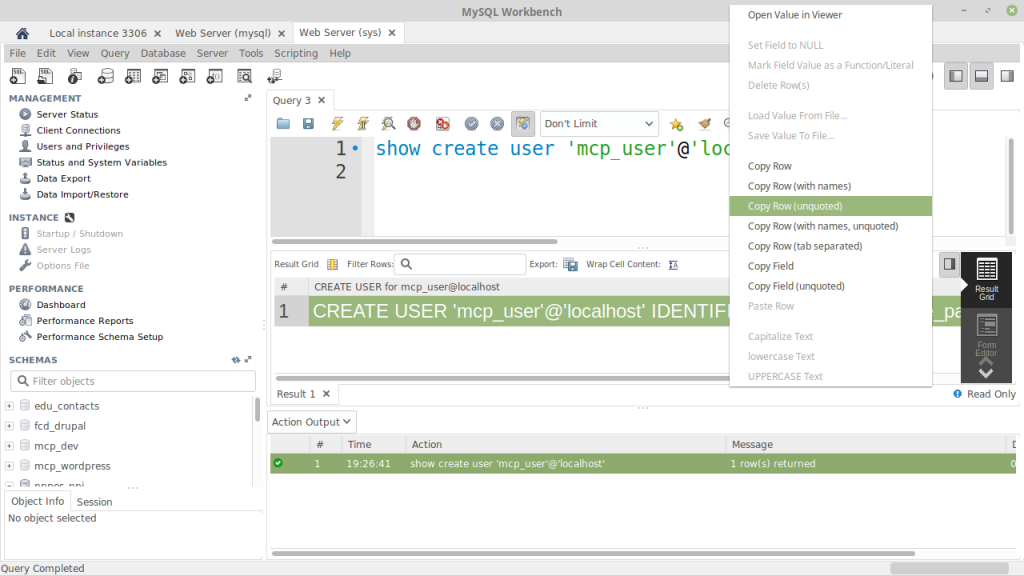
Run the query and then you can copy the results by right clicking on the Result Grid row and selecting “Copy Row (Unquoted)”. Connect to your local MySQL instance and paste the result into a new query.
Retrieve the Permissions
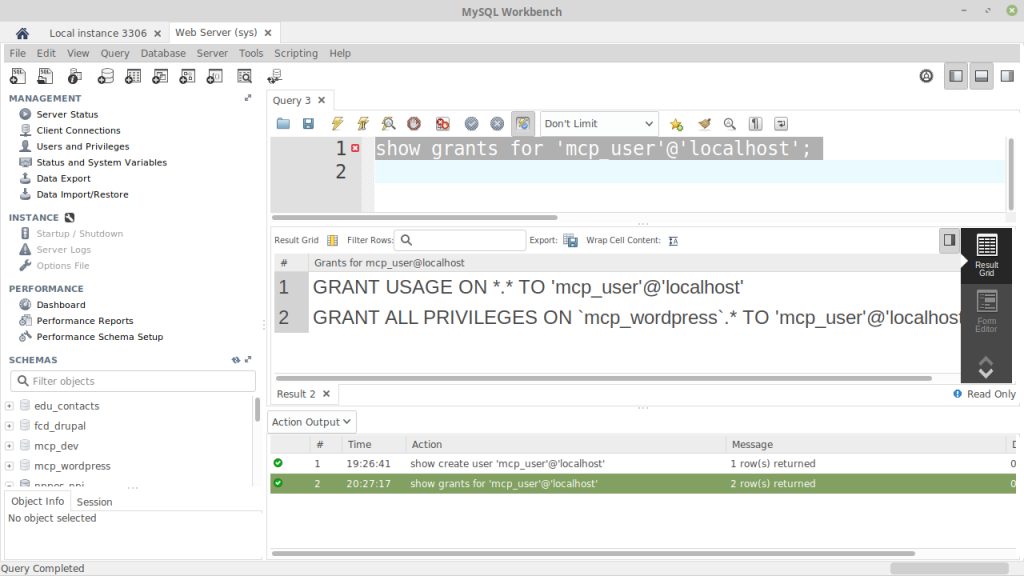
we will use the same command but for grants, again replacing “mcp_user” with your user.
show grants for 'mcp_user'@'localhost';
Perform the same copy action from above but this time select both rows before right clicking.
Copy User to Local Database
When you are finished you should have in your local host the following query, add a USE database; statement at the top, where database is the name of your schema.
USE mcp_wordpress;
CREATE USER 'mcp_user'@'localhost' IDENTIFIED WITH 'mysql_native_password' AS '*A4852D8F9BDEFAXXXDD35EED97BEXXXYYY4E5BA' REQUIRE NONE PASSWORD EXPIRE DEFAULT ACCOUNT UNLOCK;
GRANT USAGE ON *.* TO 'mcp_user'@'localhost';
GRANT ALL PRIVILEGES ON mcp_wordpress.* TO 'mcp_user'@'localhost';
GRANT ALL PRIVILEGES ON mcp_wordpress.* TO 'mcp_user'@'localhost';
Test the User
Run this SQL and the attempt to login and do a show database to confirm.
mysql -u mcp_user -p
The password will be the same as the originating database
show databases;
Only the one database should be listed in my case.
That’s it, seems like a lot but it only 7 or 8 lines of SQL. If you know how to execute the results of the SHOW GRANTS or the SHOW CREATE, statements or an easier method, leave a comment I would love to learn that without a lot of digging around.
This website uses cookies to improve your experience. We'll assume you're ok with this, but you can opt-out if you wish. Cookie settingsACCEPT
Privacy & Cookies Policy
Privacy Overview
This website uses cookies to improve your experience while you navigate through the website. Out of these cookies, the cookies that are categorized as necessary are stored on your browser as they are essential for the working of basic functionalities of the website. We also use third-party cookies that help us analyze and understand how you use this website. These cookies will be stored in your browser only with your consent. You also have the option to opt-out of these cookies. But opting out of some of these cookies may have an effect on your browsing experience.
Necessary cookies are absolutely essential for the website to function properly. This category only includes cookies that ensures basic functionalities and security features of the website. These cookies do not store any personal information.
Any cookies that may not be particularly necessary for the website to function and is used specifically to collect user personal data via analytics, ads, other embedded contents are termed as non-necessary cookies. It is mandatory to procure user consent prior to running these cookies on your website.