Posted on Leave a comment

Getting Started with React

A Step-By-Step Tutorial

    Install Node.js and npm:

    Before you can start using React, you will need to install Node.js and npm (Node Package Manager) on your computer. Node.js is a JavaScript runtime that allows you to run JavaScript outside of a web browser, and npm is a package manager for Node.js that makes it easy to install and manage JavaScript libraries and packages. You can download and install Node.js from the official website, which will also install npm for you.

    The installation will vary depending on your operating system here are the more popular installs:

    1. Ubuntu Linux: To install Node.js on Ubuntu, open a terminal and run the following commands:
    sudo apt update
    sudo apt install nodejs
    sudo apt install npm

    The first command updates the package index on your system, the second command installs Node.js, and the third command installs npm (the Node.js package manager).

    1. Red Hat Linux: To install Node.js on Red Hat Linux, open a terminal and run the following commands:
    sudo yum update
    sudo yum install nodejs
    sudo yum install npm
    

    The first command updates the package index on your system, the second command installs Node.js, and the third command installs npm (the Node.js package manager).

    1. Apple Shell: To install Node.js on a Mac using the Terminal app, you can use either Homebrew or the official Node.js installer. Here are the commands for both options:

    Using Homebrew:

    brew update
    brew install node
    

    Using the official Node.js installer:

    NOTE: This is the preferred method in order to use the most up to date version of Node.js

    curl -o- https://raw.githubusercontent.com/nvm-sh/nvm/v0.38.0/install.sh | bash
    nvm install node
    

    The first command installs Homebrew (if it’s not already installed), and the second command installs Node.js using Homebrew. The third command installs nvm (Node Version Manager), which allows you to manage multiple Node.js versions on your system, and the fourth command installs the latest version of Node.js using nvm.

    1. Windows PowerShell: To install Node.js on Windows using PowerShell, you can use the official Node.js installer. Here are the commands:
    Invoke-WebRequest -Uri https://nodejs.org/dist/v16.0.0/node-v16.0.0-x64.msi -OutFile nodejs.msi
    Start-Process msiexec.exe -Wait -ArgumentList '/I nodejs.msi /quiet /qn /norestart'
    

    The first command downloads the Node.js installer, and the second command installs Node.js on your system using msiexec (the Windows Installer).

    Create a new React project:

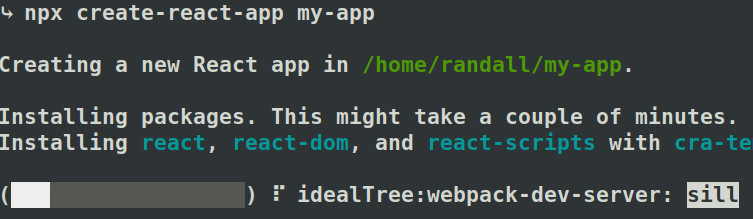
    Once you have Node.js and npm installed, you can use the “create-react-app” command to create a new React project. Open a terminal or command prompt, navigate to the directory where you want to create your project, and run the following command:

      npx create-react-app my-app

      This will create a new React project called “my-app” in the current directory, and will install all the necessary dependencies and configuration files.

      Start the development server:

      Once your React project is set up, you can start the development server by navigating to the project directory and running the following command:

      cd my-app npm start

      This will start a development server that will automatically rebuild your app whenever you make changes to the code. You can view your app in a web browser by opening http://localhost:3000.

      Understanding the project structure:

      The “create-react-app” command generates a basic project structure for you, with a few pre-built components and files. The main files you will be working with are:

      • index.html: The main HTML file that contains the root element for your React app.
      • index.js: The JavaScript file that sets up your React app and renders it into the root element.
      • App.js: The main React component that serves as the entry point for your app.

      There are also a number of other files and directories that are generated by the “create-react-app” command, such as src/index.css for your app’s CSS styles, and public/ for static assets.

        Writing your first component:

        Now that your project is set up and running, you can start writing your first React component. Open the App.js file in your text editor, and replace the existing code with the following:

        import React from 'react';
        
        function App() {
          return (
            <div>
              <h1>Hello, React!</h1>
            </div>
          );
        }
        
        export default App;
        

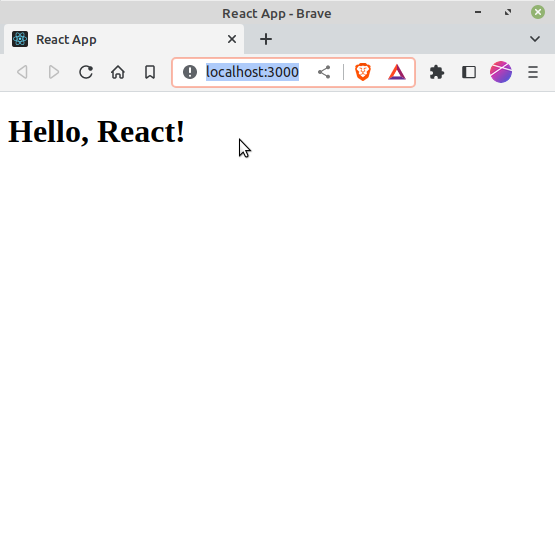
        This is a very simple component that just renders a heading that says “Hello, React!”. Notice that we are using JSX, which is a syntax extension for JavaScript that allows you to write HTML-like code in your JavaScript files.

        Rendering your component:

        Now that you have written your first component, you need to tell React to render it into the DOM. Open the index.js file in your text editor, and replace the existing code with the following:

        import React from 'react';
        import ReactDOM from 'react-dom';
        import App from './App';
        
        ReactDOM.render(
          <React.StrictMode>
            <App />
          </React.StrictMode>,
          document.getElementById('root')
        );
        

        This code imports the ReactDOM library, which is responsible for rendering your React app into the DOM, and the App component that you just wrote. The ReactDOM.render() function takes two arguments: the first is the component to render, and the second is the root element where the component should be rendered. In this case, we are rendering the App component into the root element in the index.html file.

        Adding more components:

        Now that you have successfully rendered your first component, you can start adding more components to your app. Let’s create a new component that displays a list of items. Open the App.js file in your text editor, and replace the existing code with the following:

          import React from 'react';
          
          function ItemList() {
            return (
              <ul>
                <li>Item 1</li>
                <li>Item 2</li>
                <li>Item 3</li>
              </ul>
            );
          }
          
          function App() {
            return (
              <div>
                <h1>Hello, React!</h1>
                <ItemList />
              </div>
            );
          }
          
          export default App;
          

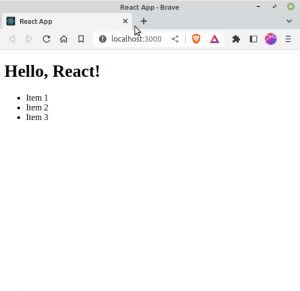
          In this code, we have created a new component called ItemList that renders an unordered list of items. We have also updated the App component to include the ItemList component.

          Working with props:

          Components can also accept properties, known as props, that allow you to pass data into a component from its parent component. Let’s modify the ItemList component to accept an array of items as a prop, and render that list dynamically. Open the App.js file in your text editor, and replace the ItemList component with the following:

            function ItemList(props) {
              const items = props.items.map((item) =>
                <li key={item.id}>{item.name}</li>
              );
              return (
                <ul>
                  {items}
                </ul>
              );
            }
            
            function App() {
              const items = [
                { id: 1, name: 'Item 1' },
                { id: 2, name: 'Item 2' },
                { id: 3, name: 'Item 3' }
              ];
              return (
                <div>
                  <h1>Hello, React!</h1>
                  <ItemList items={items} />
                </div>
              );
            }
            
            export default App;
            

            In this code, we have modified the ItemList component to accept a prop called items, which is an array of objects that represent the items in the list. We have then used the map function to loop over the items and render a list item for each one.

            Handling Events:

            React allows you to handle user events, such as button clicks or form submissions, by attaching event handlers to your components. Let’s create a new component that displays a button and handles its click event. Open the App.js file in your text editor, and add the following code to the App component:

              function handleClick() {
                console.log('Button clicked');
              }
              
              function Button() {
                return (
                  <button onClick={handleClick}>Click me</button>
                );
              }
              
              function App() {
                return (
                  <div>
                    <h1>Hello, React!</h1>
                    <Button />
                  </div>
                );
              }
              
              export default App;
              

              In this code, we have created a new component called Button that displays a button with the text “Click me”. We have also attached an onClick event handler to the button that calls the handleClick function when the button is clicked. The handleClick function simply logs a message to the console.

              Conclusion:

              Congratulations, you have successfully created a React app and learned how to create components, render them into the DOM, work with props, and handle events. This is just the beginning of what you can do with React, and there is much more to learn. I hope this tutorial has been helpful, and happy coding!

              Posted on Leave a comment

              Linux Server System Auditing – Quick Start

              I wanted a tool to quickly show me some of the basic things I needed to work on to harden the security on the various servers I am running. A sort of security checklist. The first tool I have been trying out is the community version of Lynis, and I have enjoyed it so far. With a “Hardeining index” from 1-100, it gives me a great indicator of how I am progressing.

              Once installed ( and they have detailed install instructions for many systems ) it is as easy as a single command to get you started:

              lynis audit system

              you will get a giant ( not too giant ) list of the status of your system and actionable items.

              For my scan I fixed a few things moving from 66 to 72 in my first hardening session.

              Posted on Leave a comment

              Raspberry Pi – NodeRED Button

              This simple experiment will demonstrate using a push button to light a LED.

              Adding a Push-Button to an LED in Raspberry Pi doesn’t get much easier than with NodeRED, two nodes, and you are done.

              The Fritzing Diagram is availble for download

              Wire the LED and Button as shown in the Diagram

              • Pin 1 – Left side of button
              • Pin 11 – Right side of button
              • Pin 6 – Led Cathode ( Short Wire / Flat Side )
              • Pin 7 – Led Anode ( Long Wire )

              If you simply want to try this Flow, you can import this:

              [{"id":"60410dd4.757164","type":"rpi-gpio out","z":"308cfa1.ad68d06","name":"","pin":"7","set":true,"level":"0","freq":"","out":"out","x":253.4615135192871,"y":348.46156311035156,"wires":[]}]

              To run this experiment we will use only two nodes rpi-gpio In and rpi-gpio out. Drag one of each onto the Flow edit pane.

              When you drop the Nodes the Labeling is updated to reflect the configuration. The two Nodes before wiring will look like this. There has been nothing done to them other than dropping them onto the flow.

              Wire the Nodes together

              Configure the Input Node

              1. Double Click the rpi-gio In ( it is marked PIN:tri ).
              2. Set the Pin to 11
              3. set the resistor to pull-down
              4. Click Done

              The node Should change to PIN 11

              Configure the Output Node

              1. Double Click the rpi-gio out ( it is marked PIN: ).
              2. Set the Pin to 7
              3. Check “Initial pin state?”
              4. Select “initial level of pin -low(0)
              5. Click Done

              The Output Node should now be labelled PIN: 7

              Deploy the Flow

              If you have done everything correctly you should now be able to press the button and the LED will light.

              Posted on Leave a comment

              Raspberry Pi – NodeRed LED Blink

              Using NodeRED to program your RaspberryPi for GPIO Control.

              The basic installation of Raspian includes NodeRED. However you need to start it to use it.

              Connect to your Raspberry Pi using your terminal. Issue the NodeRED startup command:

              node-red-start

              The first line after the “Start Node-RED” will contain where you need to point your browser. Remember that your Raspberry Pi is a fairly small computer so it might take it a little while to load ( possible minutes ).

              The console will update once Node-RED has started, it is ready when you see the final line state “Server s now Running …”

              Now we can connect with our browser

              Let’s Add Nodes

              We will use the Inject Node as the “Button”, Drag one of the Inject nodes to the Flow area:

              Double click the node to open the edit panel. From the Payload drop-down select boolean and leave the value as True.

              Click Done, and you will see that the Inject node now reads as “true”

              To easily find the Raspberry Pi nodes type rpi in the node search tool at the top left. Drag a single rpi gio Output node to the Flow area and drop it near the Inject Node.

              Wire the Inject node to the gpio node:

              Double click the PIN Node ( rpi gpio ) to enter into edit mode and select Pin 7 and make certain the type is Digital Output.

              Add the “Off Switch”

              Let’s Drag a Second Inject node onto the Flow area

              Double click the Inject to edit

              Change it to boolean and set the value to false.

              Wire the “false” node to the same pin as the true node.

              The final step before you can use either of the buttons is to Deploy the Flow.

              Clicking the small blue box next to the “true” inject node will turn the LED on and “false” will turn it off.

              Posted on Leave a comment

              Raspberry Pi – Getting Started with an LED

              To get started with controlling and interfacing electronics with the Raspberry Pi, the easiest and safest way is turning a LED On and Off. It is simple but it works.

              Interactively, First

              If you have installed Raspian on your Raspberry Pi it comes with Python pre-installed. All you need to do is bring up a terminal and type python <enter> to get to the python console. It looks like this:

              The python console let’s you execute code as you go, it is a great way to learn and test small pieces of code.

              To control the GPIO pins on the Raspberry Pi we need to add a tool that knows how to control them this is the GPIO Library ( there are others as well ). To add the library we will use the import command. Type the command as show and hit the Enter Key. If done correctly the python console will simply accept it and prompt you for the next line.

              >>>import RPi.GPIO as GPIO
              >>>

              Know that we have the tool we need to tell the python console specifically how to use it. We will be using BOARD mode. This means we will be referring to the PINS as they are physically numbered and laid out. Again you will get no prompt, simply the next line.

              >>>import RPi.GPIO as GPIO
              >>>GPIO.setmode(GPIO.BOARD)
              >>>

              The pins are numbered with Odd Pins in one Row and Even pins in the other. The numbering starts from 1 and 2 next to the Power LED. Pin 1 sits near the inside of the board and Pin 2 near the edge. We will wire Pin 6 and Pin 7 to the LED. Pin 6 is GND ( Ground or Negative ) will be wired to the short leg of the LED or the Cathode. Pin 7 will be wired to the Short leg or the Anode.

              Next we need to tell python what to do with pin 7. We use the GPIO.setup() command to indicate that the the Pin will be used for output. The GPIO.OUT is used to indicate output.

              >>>GPIO.setup(7,GPIO.OUT)
              >>>

              To turn the LED on we set the pin to True using GPIO.output()

              >>>GPIO.output(7,True)
              >>>

              To turn the LED off we set the pin to False using GPIO.output()

              >>>GPIO.output(7,False)
              >>>

              Let’s make a command file.

              To complete this on the command line we will use a program called nano. It is a command line based text editor. For more advance python it can be beneficial to use an IDE

              Open the editor by executing the nano command and type all the commands from above into the nano windows

              When done press CTRL-O, type in the name ledon.py, press enter the CTRL-X

              Test the command, type:

              python ledon.py

              Our Second Command

              copy the ledon.py to ledoff.py, and open the file with nano ledoff.py

              Change the True in line 4 to False

              Run the command to turn the led off

              python ledoff.py

              You will notice there is a warning, let’s take care of that.

              Using nano add GPIO.cleanup() to the end of each file

              You can now turn the LED On and Off from anywhere you can get a terminal on your Raspberry Pi

              Posted on Leave a comment

              Getting Started with PyCharm – Hello World

              PyCharm is a fully featured IDE. For the new user this can be quite overwhelming. Even for the seasoned developer it can be quite difficult finding your way through a new IDE. Completing a simple hello-world app is a great way to break ground on this tool.

              We will start from the welcome screen. After you have installed and launched PyCharm this is how you will be greeted.

              PyCharm Welcome Screen
              PyCharm Welcome Screen

              1.) Select “Create New Project”, and you will see the screen slide over and we can walk through the “New Project” dialog.

              PyCharm - New Project Dialog
              PyCharm New Project Dialog Screen


              2.) Change the file name to “hello-world”

              PyCharm - Name a New Project
              PyCharm – name a new-project

              3.) Click Create

              PyCharm - Create Button

              4.) Right CLick on the FileFolder name “hello-world” on the left side of the screen. Select “New”, the “Python FIle

              PyCharm - Add a Python File
              PyCharm – add a new Python file to your project

              5.) Give your python file a name, like “helloworld”

              PyCharm - Name a New Python File

              6.) Now type this into the black pane on the right:

              print ("hello world!")
              PyCharm - HelloWorld code
              PyCharm add code to your project

              7.) Highlight the “helloworld.py” file in the Project Tree on the left and click the Run item in Top menu. The second Run entry will be highlighted, select that.

              Pycharm - Running Code

              8.) From the Run Dialog select the helloworld file ( right facing white triangle ). The click green Run Arrow

              PyCharm - Select file to run

              If all goes well you will see the run output at the bottom of your screen.

              PyCharm - helloworld code output

              An that is all there is to it. Once you have navigated the “helloworld” you have the basics necessary to use this IDE.

              Posted on Leave a comment

              DIY Analytics – Matomo Install for WordPress

              Get the latest Matomo ( Piwik ) code

              wget https://builds.matomo.org/matomo-latest.zip

              Place this file into your Apache2 httpd “Document” directory and unzip/untar

              unzip matomo-latest.zip

              Set permission to the owner of the httpd process ( www-data in my case )

              chmod -R www-data:www-data matomo

              Check the permissions

              ls -l 

              Make it accessable

              I like to just place a symbolic link in the Documents directory of the Virtual Host I am using it with. I don’t know what the security ramifications of this might be. You, of course, will have to discern the paths for your particular setup. I keep my Virtual Hosts and Matomo at the same level.

              ln -s ../matomo matomo

              Browse to the newly installed system, and work through the installation. You will likely have to install some PHP extensions to get the system working fully. I had to install mbstring.

              Update you apt so you get that latest

              apt update

              First find the package

              apt-cache search mbstring
              
              php-mbstring - MBSTRING module for PHP [default]
              php-patchwork-utf8 - UTF-8 strings handling for PHP
              php-symfony-polyfill-mbstring - Symfony polyfill for the Mbstring extension
              php-symfony-polyfill-util - Symfony utilities for portability of PHP codes
              php7.2-mbstring - MBSTRING module for PHP

              What PHP Version

              php -v
              
              PHP 7.2.24-0ubuntu0.18.04.3 (cli) (built: Feb 11 2020 15:55:52) ( NTS )
              Copyright (c) 1997-2018 The PHP Group
              Zend Engine v3.2.0, Copyright (c) 1998-2018 Zend Technologies
              with Zend OPcache v7.2.24-0ubuntu0.18.04.3, Copyright (c) 1999-2018, by Zend Technologies

              Ok install the correct one

              apt install php7.2-mbstring

              Restart the web server

              systemctl restart apache2

              Once you have worked through all the PHP extensions fin the link for continueing over SSL:

              Next, to the database setup, bring up a console to create a user for Matomo:

              Modern distrubutions allow root to connect from a local terminal instance ( ssh ) without user name and password, type mysql at the console to get the mysql-client command prompt:

              Create the database:

              CREATE DATABASE matomo;

              Add a user

              CREATE USER ‘matomo’@’localhost’ identified by ‘agoodpasswordgoeshere’;

              Give the user permissions on the database

              GRANT ALL ON matomo.* to ‘matomo’@’localhost’;

              Head back to the Matomo installation wizard and Complete step 5 through 8 for your website. I am using WordPress so I only need the tracking code to plug into the WordPress Plugin.

              The office WordPress Plugin for Matomo Let’s simply add the plugin and Activate. Using the default tracking option you should be good to go!

              Posted on Leave a comment

              WordPress, Apache and MySQL – Memory Management, 2 simple things.

              How to keep them happy together.

              Running a Low Traffic Website on a Low-End server is a great way to learn. Constrained resources necessitate careful planning of your services. In my journey to keep MySQL from crashing due to memory constraints, these two items fixed the problem.

              I manage my own web site ( this site ) as a means to learn and grow my technical know-how. It does not generate any revenue, yet. As a result, I spend the least amount of money on it as possible resulting in the most anemic server. At the writing of this article, my site was slowing to a crawl and MySQL was regularly crashing. Inspecting the processes that where running I found that kswapd, the swap file daemon, was chewing on 50% of my CPU time. It was time for a beginner’s lesson in resource management.

              Put MySQL on a Diet

              WordPress uses MyISAM as the default storage mechanism. On my distribution InnoDB is included in the default setup. It is not needed for WordPress. As I am only running WordPress on this server I decided to remove InnoDB and free up some memory.

              To remove InnoDB support you will need to find your mysql.cnf. More specifically you will need to find the instance that is being used by MySQL. I am running Ubuntu 18.x on my server. Ubuntu is a Debian based system so my configuration file is located here:

              /etc/mysql/mysql.conf.d

              The MySQL configuration file uses sections denoted with brackets []. For example., there are two sections one name [mysqld_safe] and one called [mysqld]. The sections are completed at the start of the next section.

              Place the following command anywhere after the [mysqld] but before the next []

              ignore-builtin-innodb

              You can now restart the MySQL service with one of the following commands:

              service mysql restart
              systemctl restart mysql
              sudo /etc/init.d/mysql start

              Break up the Apache Party

              When I checked in on Apache using the command top.I had 26 processes running for Apache. My website just simply isn’t popular and not so important that it needs that much attention. The spammers and search engine bots can wait. Maybe someday I will need more resources for connections but not today.

              With the version of Apache2 I am running on a Debian based system the configuration can be found in the mods-available sub-directory. However is you work from the mods-enabled directory you will see a smaller sub-set of choices. You will also answer the question of whether or not the mod you are configuring is actually enabled simply by seeing it in the directory.

              To tame Apache bring up the configuration file in your favorite editor, mine nano.

              sudo nano /etc/apache2/mods-enable/mpm-prefork.conf

              I changed the following to lines to experiment on performance:

                 MaxSpareServers          8
                 MaxRequestWorkers       10

              Squeeking in under the wire

              These two tasks have moved my server sentiment from annoying to hopeful. This micro-server now sits just below the meager physical memory limit imposed by it’s $3.00 budget. Take a look at my output from top.

              top - 09:50:03 up 15:11,  1 user,  load average: 2.76, 1.17, 0.91
              Tasks:  93 total,   2 running,  52 sleeping,   8 stopped,   0 zombie
              %Cpu(s):  8.4 us,  7.0 sy,  0.0 ni, 84.0 id,  0.5 wa,  0.0 hi,  0.0 si,  0.0 st
              KiB Mem :   492640 total,     8576 free,   379640 used,   104424 buff/cache
              KiB Swap:   524284 total,   267688 free,   256596 used.    67740 avail Mem 

              I am just getting by with a teeny bit of left-over space. The key bit is kswapd has calmed down and now MySQL is no longer crashing. It may be short-lived but it is a victory for today.

              Update 1:

              Had to up the MaxRequestWorkers to 25, pages kept timing out.

              Update 2:

              Trying to find the lowest number of “Starting” and “Spare” servers I can get away with. Starting with one and having three spare.

              Update3: Final Update

              Looks like I have tamed the beast. I am now sitting at about 100mb free space. The final step was deactivating WordPress Plugins I did not need. I am very glad it worked as I was about to start dis-abling Apache2 mods that WordPress does not use and I am fairly ignorant on that subject, for now.

              Posted on Leave a comment

              Docker Compose – The minimalist instructions

              The first pieces of how to use Docker Compose

              What is Docker Compose

              For me, docker-compose is a case study in the right tool for the right job. At the least, it allows us to carefully manage and maintain the instancing of our containers. docker-compose takes the command-line options for docker and places them into configuration files.

              Continue reading Docker Compose – The minimalist instructions