Using the popular HC-SR204 gives an easy to understand and implement look at how the Arduino can interact with the world around it.
Arduino Code ( INO ) File No Comments
Let’s Start with Wiring
This is a fairly easy bit of kit to wire. Let’s make sure you have all the materials. We will need
- One Arduino UNO style board
- One Ultrasonic Sensor ( We are using the HC-SR204, four wire version ).
- Four Hookup Wires
- Breadboard
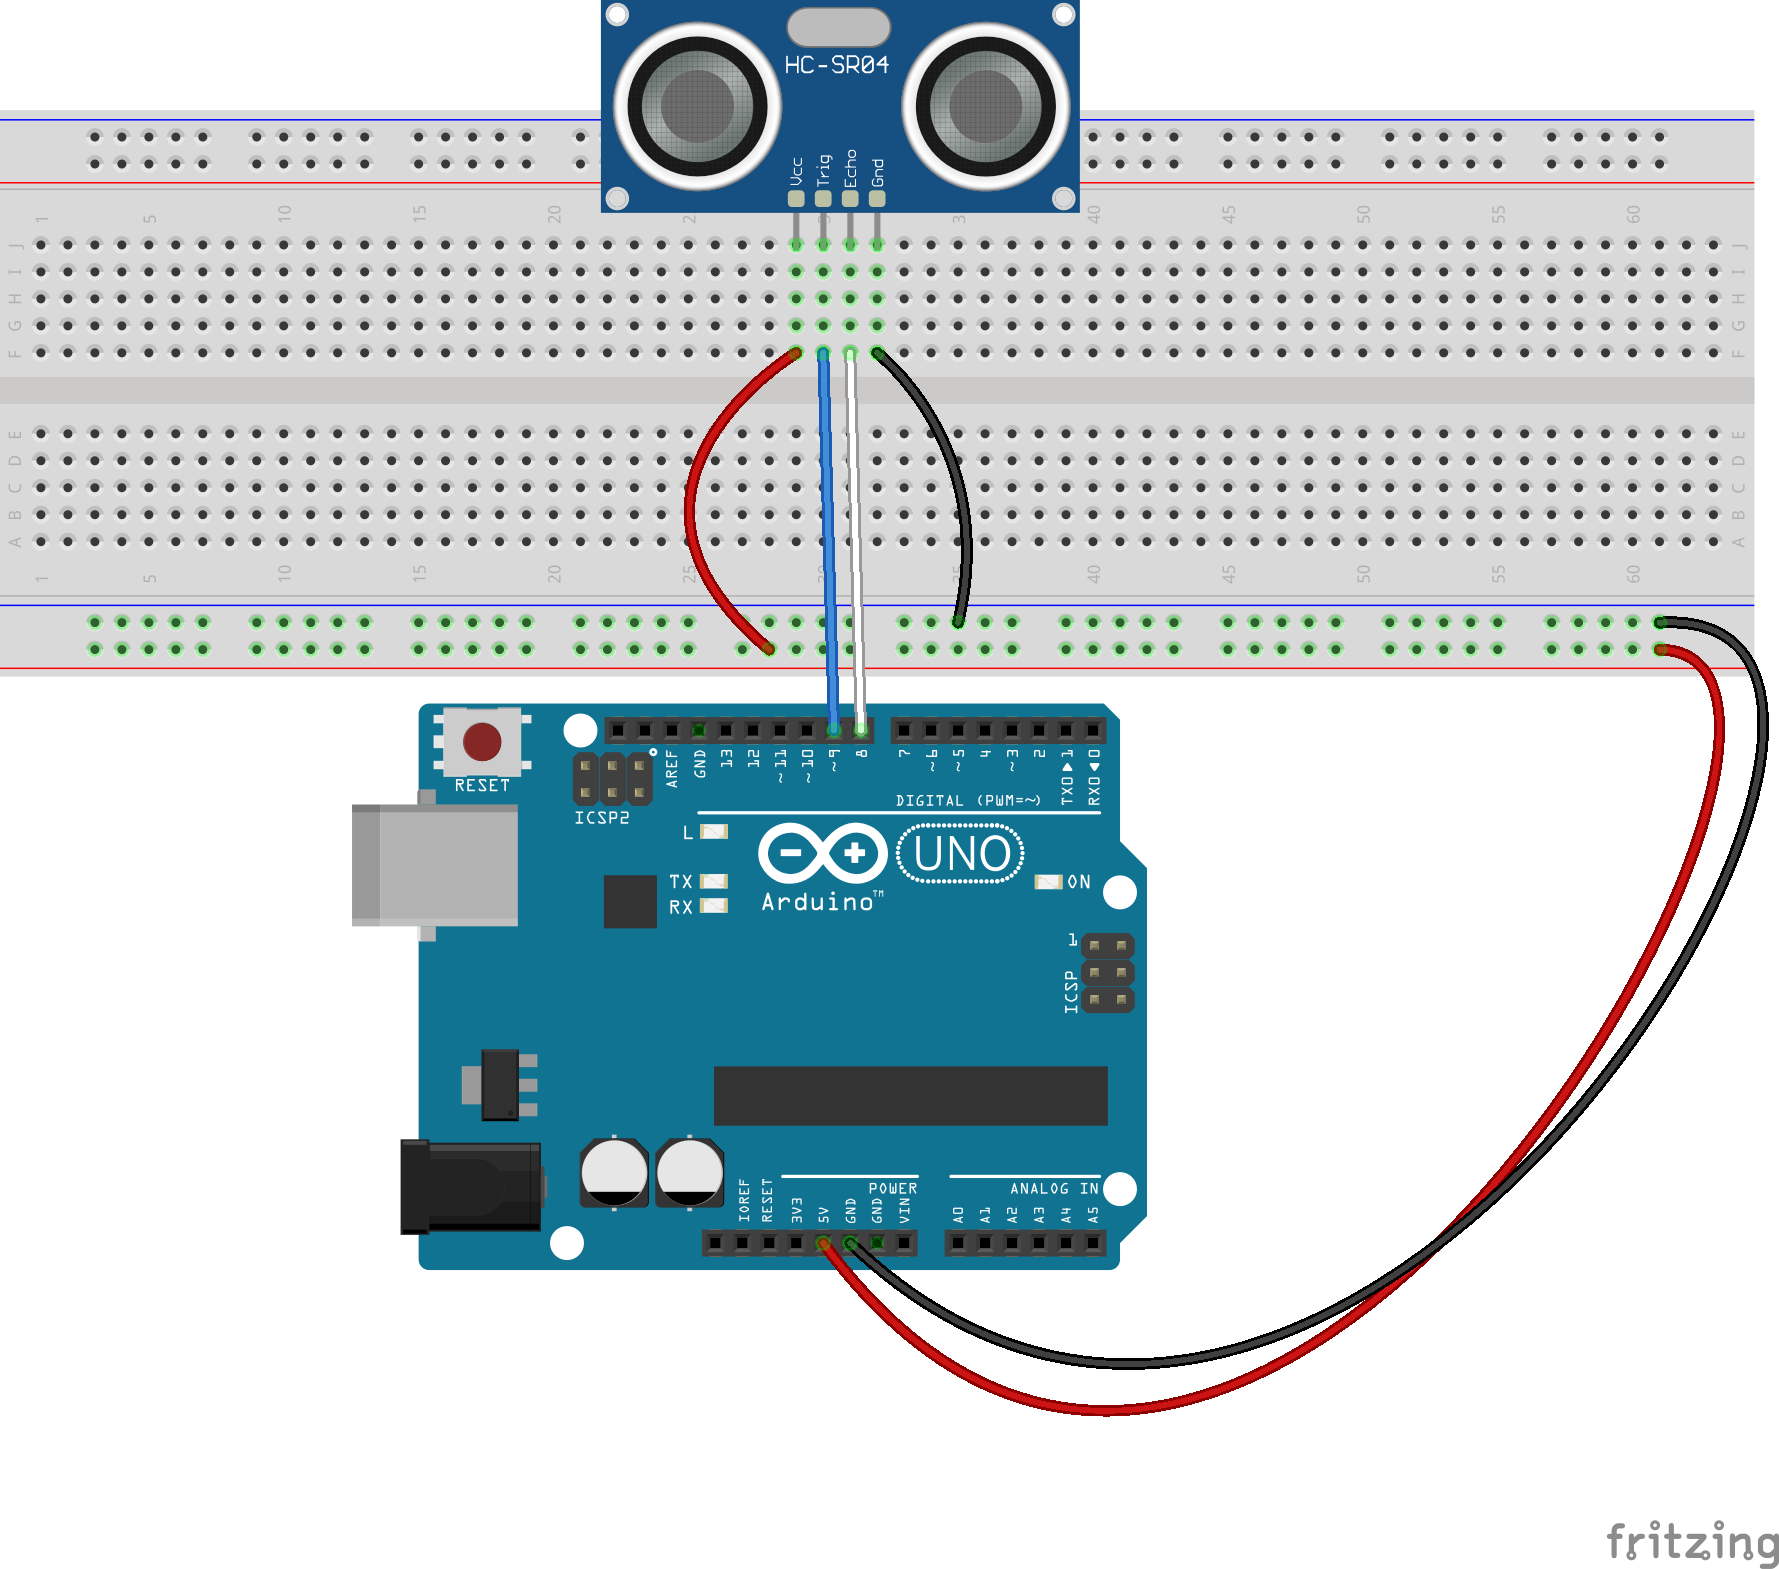
Place the the Ultrasonic Sensor onto the Breadboard with the VCC Pin in Colum 10 of the Breadboar
The colums should line up as follows
- VCC- 10
- Trig – 11
- Echo -12
- GND -13
Now let’s wire the Arduino to the Breadboard, we can start with Wiring Power and Ground
Connect a Red hookup wire from the +5v on the Arduino Power Header to To column 10 on the Breadboard. This will connect VCC on the Ultrasonic Sensor.
Connect a Black hookup wire from the GND on the Arduino Power Header to To column 13 on the Breadboard. This will connect GND on the Ultrasonic Sensor.
Now let’s hookup the “Data” lines
Connect a White wire from Digital Pin 8 on the ARduino to Colum 11 on the Breadboard. This will connect digital Pin 8 to the Trig port on the sensor
Connect a Blue wire from Digital Pin 9 on the Arduino to Colum 12 on the Breadboard. This will connect digital Pin 9 to the Echo port on the sensor
Copy the following code to your Arduino IDE and Upload it to your Arduino
/* Adapted from
/* Example code for HC-SR04 ultrasonic distance sensor with Arduino. No library required. More info: https://www.makerguides.com . This is the uncommented version, there is a strongly commented version at the beginning of this article.
*/
// Define Trig and Echo pin:
#define trigPin 8
#define echoPin 9
// Define variables:
long duration;
int distance;
void setup() {
pinMode(trigPin, OUTPUT);
pinMode(echoPin, INPUT);
Serial.begin(9600);
}
void loop() {
digitalWrite(trigPin, HIGH);
delayMicroseconds(10);
digitalWrite(trigPin, LOW);
duration = pulseIn(echoPin, HIGH);
Serial.print( "Duration in microseconds: " );
Serial.print( duration );
Serial.print (" ");
distance = duration * 0.034/2;
Serial.print("Distance = ");
Serial.print(distance);
Serial.println(" cm");
delay(1000);
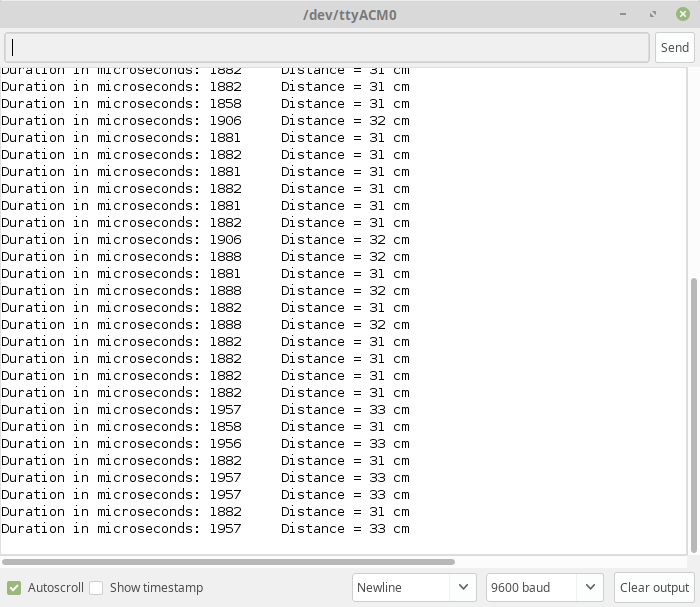
}Once you have finished uploading the Arduino will restart and you should start seeing distance readiings in the serial console.