
How to start the Keyboard and Mouse sharing tool Barrier from a SSH Command line.

Server on Linux 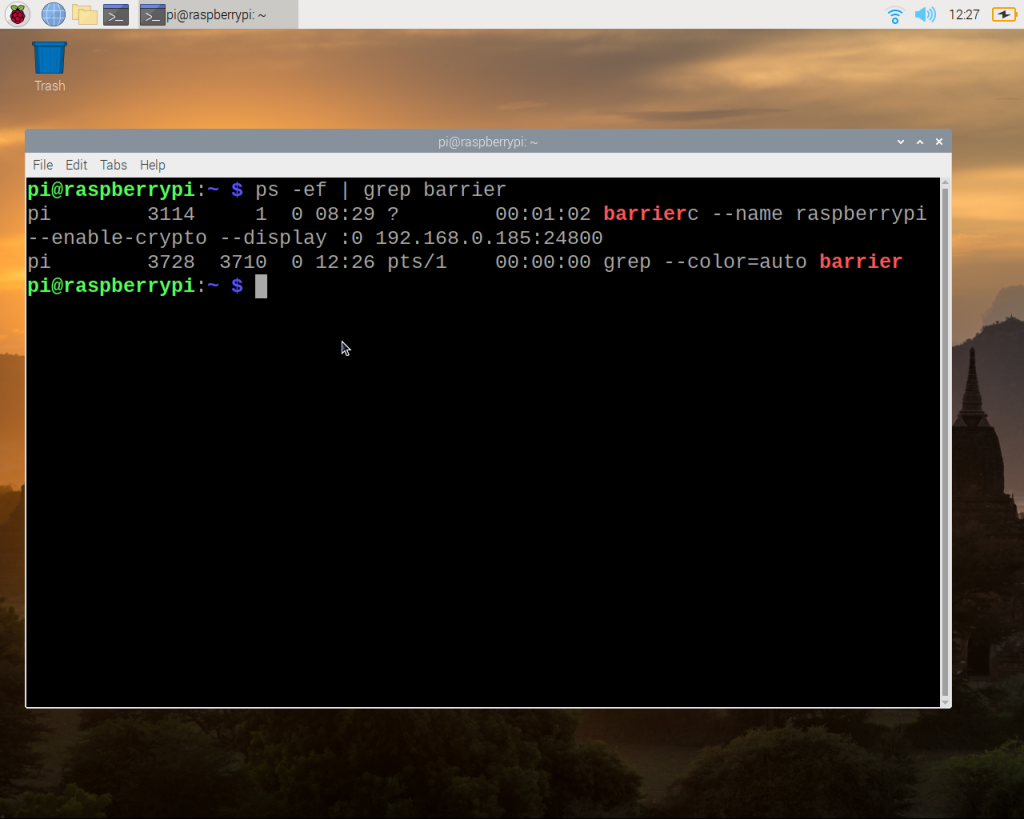

Screen Shot to Clipboard on Rpi
Nothing is worse than having your Keyboard and Mouse sharing working but having to USB swap your keyboard when, for some reason or another, your Barrier install disconnects. With a few pieces of knowledge, you can ditch the second Keyboard and never USB swap again.
Pre-Requisites
- ssh server running on the target RaspberryPi
- Ability to login as the same user running the desktop on your RasberryPi
- barrier installed on both machines.
Bare Bones Attempt
If all is well on your systems, this “might” work. Each line is a command. You will have to take the IP address from line 2 and plug it in to line 4 where you see my IP.
barrier
hostname -I
ssh pi@raspberrypi
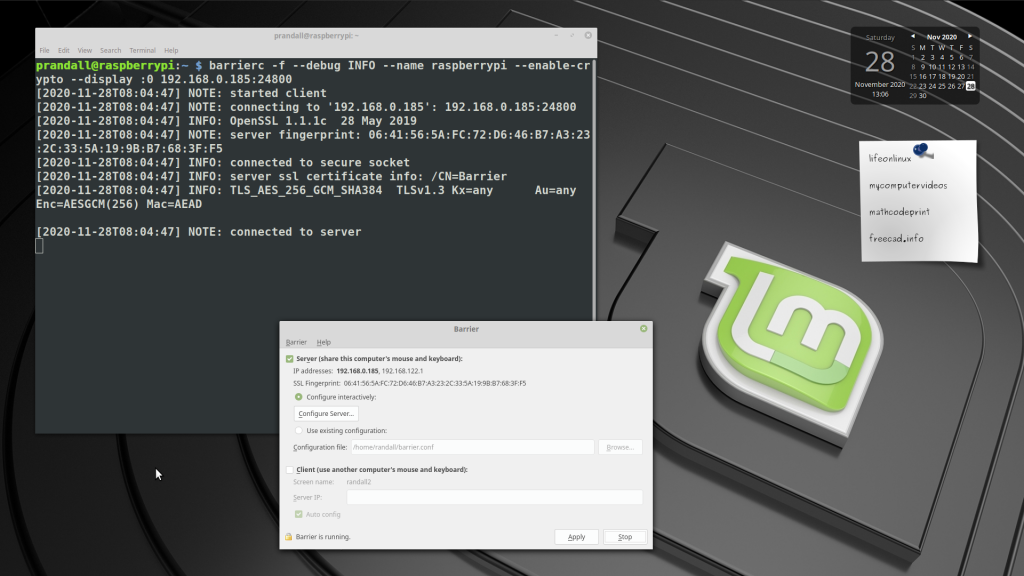
barrierc --name raspberrypi --enable-crypto --display :0 192.168.0.185:24800barrier, barrierc, barriers
The barrier tool is in actuality multiple programs.
barrier – A “wrapper” that runs th GUI
barrierc – The Barrier client
barriers – The Barrier server
The barrier command does not have an command line ability and simply launches the GUI which in turn launches the client or server as per chosen options. We will run the barrier client on the raspberry pi
To begin SSH to your RaspberryPi, it should looks something like this:
ssh pi@192.168.0.100Identify the Client “Screen”
RaspberryPi runs a system called X. In order to connect the client to the proper desktop display we need to get something known as the display number. We can use the command w to get this information. Simply type W at the command line
pi@raspberrypi:~ $ w
 11:37:04 up  6:24,  3 users,  load average: 0.04, 0.10, 0.09
USER     TTY      FROM             LOGIN@   IDLE   JCPU   PCPU WHAT
pi       tty7     :0               08:19    6:24m 39.88s  1.03s /usr/bin/lxsess
pi       tty1     -                07:04    4:31m  1.38s  0.51s -bash
pi       pts/0    192.168.0.185    11:35    0.00s  0.58s  0.04s w
pi@raspberrypi:~ $
The two most important pieces of information are from the columns USER and FROM
We want the first entry in the list, it is the user on tty7, user pi, you can see it is connected to the display :0 under the FROM column. This is why we used pi from ssh, to guarantee we have the same permission and access to the screen.
Let’s see the command and breakdown each option.
barrierc -f –debug INFO –name raspberrypi –enable-crypto –display :0 192.168.0.185:24800
barrierc – This is client binary
-f
Runs the command in the foreground, useful for getting things going so we can kill the client easily.
–debug INFO
provides information about what is happening, feedback.
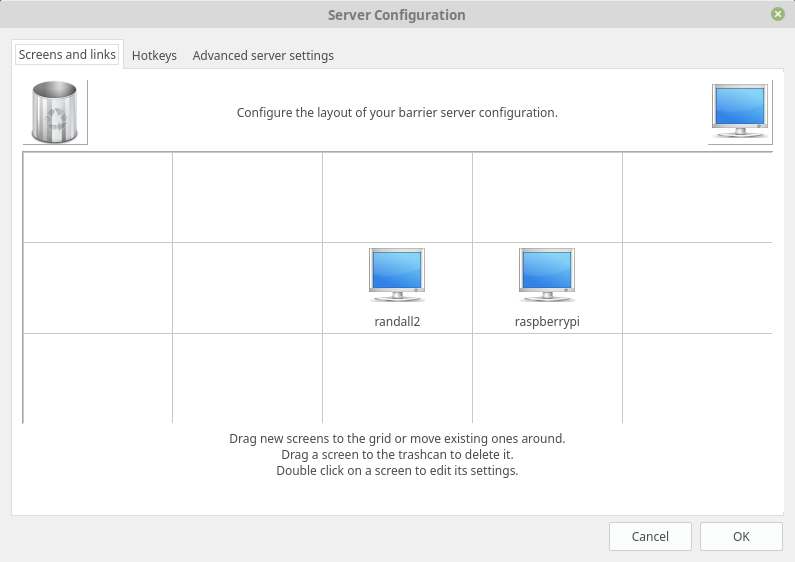
–name raspberrypi
This is the name that you must add on the server config
–enable-crypto
The transmission of the mouse and keyboard data should be encrypted to avoid interception. The server is enabled by default and you will not be able to connect the client without this turned on.
–display :0
This is the X-Server display number the client is going to control keyboard and mouse for. This is the key difference when executing a graphically element from a desparate console. The barrierc program needs to be told what Desktop it is going to work with.
Normally the barrierc program is executed from within the desktop/windowing system that it is targeting so you don’t need to tell it, but as we are starting it remotely we need indicate the display number.
192.168.0.185:24800
Barrier Server IP and Port Number