A Step-By-Step Tutorial
Install Node.js and npm:
Before you can start using React, you will need to install Node.js and npm (Node Package Manager) on your computer. Node.js is a JavaScript runtime that allows you to run JavaScript outside of a web browser, and npm is a package manager for Node.js that makes it easy to install and manage JavaScript libraries and packages. You can download and install Node.js from the official website, which will also install npm for you.
The installation will vary depending on your operating system here are the more popular installs:
- Ubuntu Linux: To install Node.js on Ubuntu, open a terminal and run the following commands:
sudo apt update
sudo apt install nodejs
sudo apt install npm
The first command updates the package index on your system, the second command installs Node.js, and the third command installs npm (the Node.js package manager).
- Red Hat Linux: To install Node.js on Red Hat Linux, open a terminal and run the following commands:
sudo yum update
sudo yum install nodejs
sudo yum install npm
The first command updates the package index on your system, the second command installs Node.js, and the third command installs npm (the Node.js package manager).
- Apple Shell: To install Node.js on a Mac using the Terminal app, you can use either Homebrew or the official Node.js installer. Here are the commands for both options:
Using Homebrew:
brew update
brew install node
Using the official Node.js installer:
NOTE: This is the preferred method in order to use the most up to date version of Node.js
curl -o- https://raw.githubusercontent.com/nvm-sh/nvm/v0.38.0/install.sh | bash
nvm install node
The first command installs Homebrew (if it’s not already installed), and the second command installs Node.js using Homebrew. The third command installs nvm (Node Version Manager), which allows you to manage multiple Node.js versions on your system, and the fourth command installs the latest version of Node.js using nvm.
- Windows PowerShell: To install Node.js on Windows using PowerShell, you can use the official Node.js installer. Here are the commands:
Invoke-WebRequest -Uri https://nodejs.org/dist/v16.0.0/node-v16.0.0-x64.msi -OutFile nodejs.msi
Start-Process msiexec.exe -Wait -ArgumentList '/I nodejs.msi /quiet /qn /norestart'
The first command downloads the Node.js installer, and the second command installs Node.js on your system using msiexec (the Windows Installer).
Create a new React project:
Once you have Node.js and npm installed, you can use the “create-react-app” command to create a new React project. Open a terminal or command prompt, navigate to the directory where you want to create your project, and run the following command:
npx create-react-app my-appThis will create a new React project called “my-app” in the current directory, and will install all the necessary dependencies and configuration files.

Start the development server:
Once your React project is set up, you can start the development server by navigating to the project directory and running the following command:
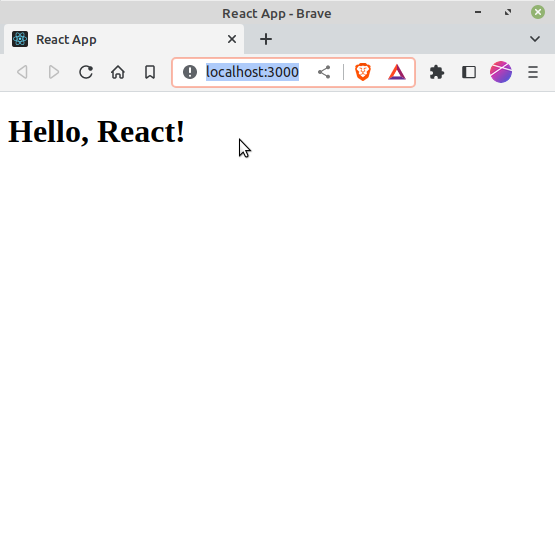
cd my-app npm startThis will start a development server that will automatically rebuild your app whenever you make changes to the code. You can view your app in a web browser by opening http://localhost:3000.
Understanding the project structure:
The “create-react-app” command generates a basic project structure for you, with a few pre-built components and files. The main files you will be working with are:
index.html: The main HTML file that contains the root element for your React app.index.js: The JavaScript file that sets up your React app and renders it into the root element.App.js: The main React component that serves as the entry point for your app.
There are also a number of other files and directories that are generated by the “create-react-app” command, such as src/index.css for your app’s CSS styles, and public/ for static assets.
Writing your first component:
Now that your project is set up and running, you can start writing your first React component. Open the App.js file in your text editor, and replace the existing code with the following:
import React from 'react';

function App() {
  return (
    <div>
      <h1>Hello, React!</h1>
    </div>
  );
}

export default App;
This is a very simple component that just renders a heading that says “Hello, React!”. Notice that we are using JSX, which is a syntax extension for JavaScript that allows you to write HTML-like code in your JavaScript files.
Rendering your component:
Now that you have written your first component, you need to tell React to render it into the DOM. Open the index.js file in your text editor, and replace the existing code with the following:
import React from 'react';
import ReactDOM from 'react-dom';
import App from './App';

ReactDOM.render(
  <React.StrictMode>
    <App />
  </React.StrictMode>,
  document.getElementById('root')
);
This code imports the ReactDOM library, which is responsible for rendering your React app into the DOM, and the App component that you just wrote. The ReactDOM.render() function takes two arguments: the first is the component to render, and the second is the root element where the component should be rendered. In this case, we are rendering the App component into the root element in the index.html file.

Adding more components:
Now that you have successfully rendered your first component, you can start adding more components to your app. Let’s create a new component that displays a list of items. Open the App.js file in your text editor, and replace the existing code with the following:
import React from 'react';

function ItemList() {
  return (
    <ul>
      <li>Item 1</li>
      <li>Item 2</li>
      <li>Item 3</li>
    </ul>
  );
}

function App() {
  return (
    <div>
      <h1>Hello, React!</h1>
      <ItemList />
    </div>
  );
}

export default App;
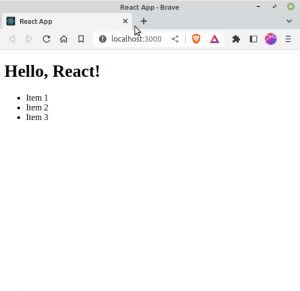
In this code, we have created a new component called ItemList that renders an unordered list of items. We have also updated the App component to include the ItemList component.

Working with props:
Components can also accept properties, known as props, that allow you to pass data into a component from its parent component. Let’s modify the ItemList component to accept an array of items as a prop, and render that list dynamically. Open the App.js file in your text editor, and replace the ItemList component with the following:
function ItemList(props) {
  const items = props.items.map((item) =>
    <li key={item.id}>{item.name}</li>
  );
  return (
    <ul>
      {items}
    </ul>
  );
}

function App() {
  const items = [
    { id: 1, name: 'Item 1' },
    { id: 2, name: 'Item 2' },
    { id: 3, name: 'Item 3' }
  ];
  return (
    <div>
      <h1>Hello, React!</h1>
      <ItemList items={items} />
    </div>
  );
}

export default App;
In this code, we have modified the ItemList component to accept a prop called items, which is an array of objects that represent the items in the list. We have then used the map function to loop over the items and render a list item for each one.
Handling Events:
React allows you to handle user events, such as button clicks or form submissions, by attaching event handlers to your components. Let’s create a new component that displays a button and handles its click event. Open the App.js file in your text editor, and add the following code to the App component:
function handleClick() {
  console.log('Button clicked');
}

function Button() {
  return (
    <button onClick={handleClick}>Click me</button>
  );
}

function App() {
  return (
    <div>
      <h1>Hello, React!</h1>
      <Button />
    </div>
  );
}

export default App;
In this code, we have created a new component called Button that displays a button with the text “Click me”. We have also attached an onClick event handler to the button that calls the handleClick function when the button is clicked. The handleClick function simply logs a message to the console.
Conclusion:
Congratulations, you have successfully created a React app and learned how to create components, render them into the DOM, work with props, and handle events. This is just the beginning of what you can do with React, and there is much more to learn. I hope this tutorial has been helpful, and happy coding!
