
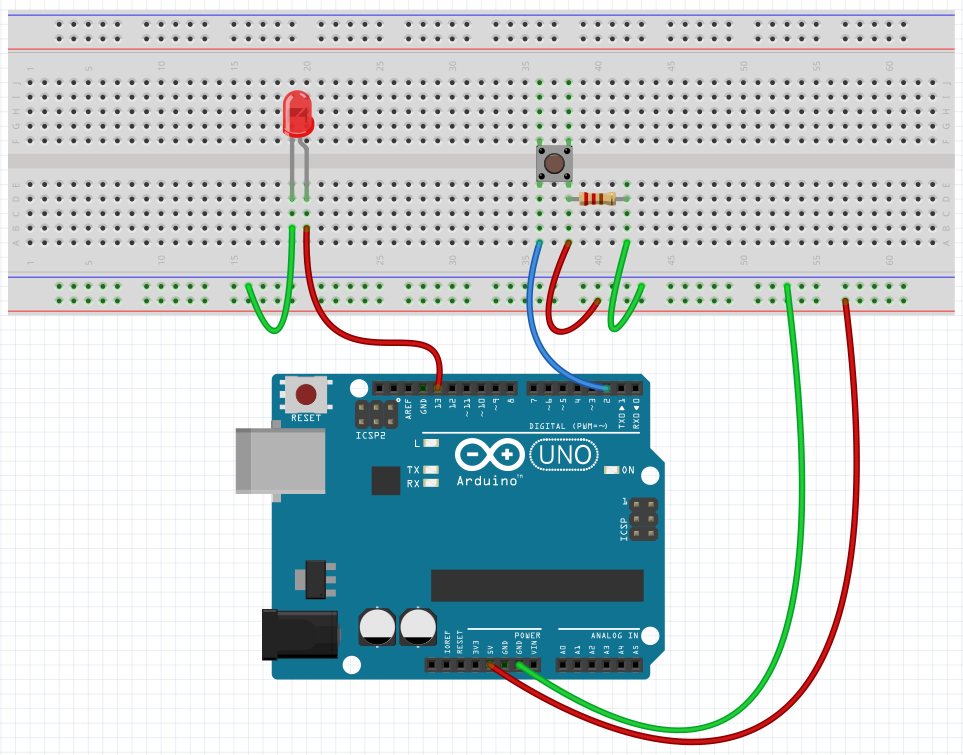
The button sketch uses a single button press to light an LED. The button sketch introduces the concept of Input and Conditional execution of code.

Arduino Sketch ( INO File ) – No Comments Version
How the Momentary PushButton works
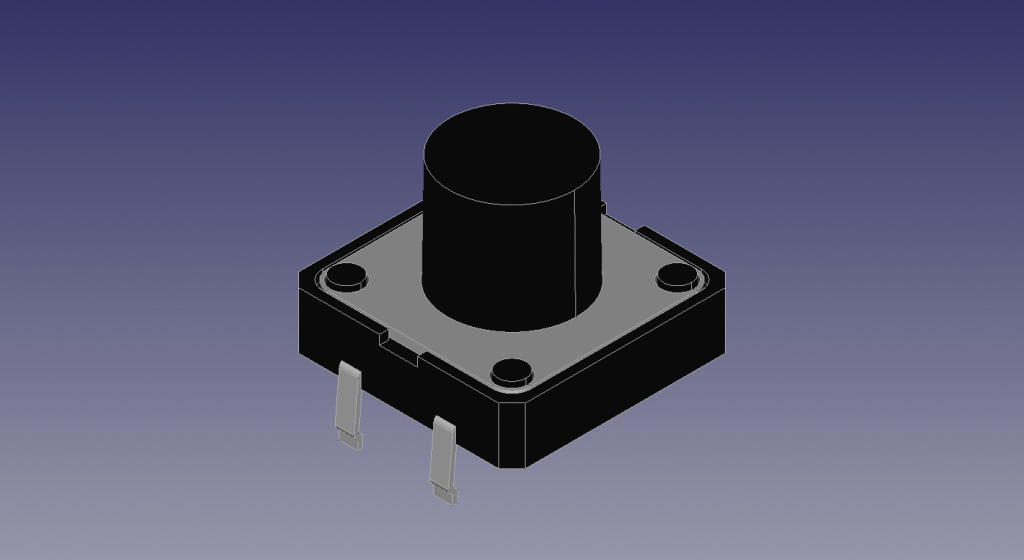
figure 1
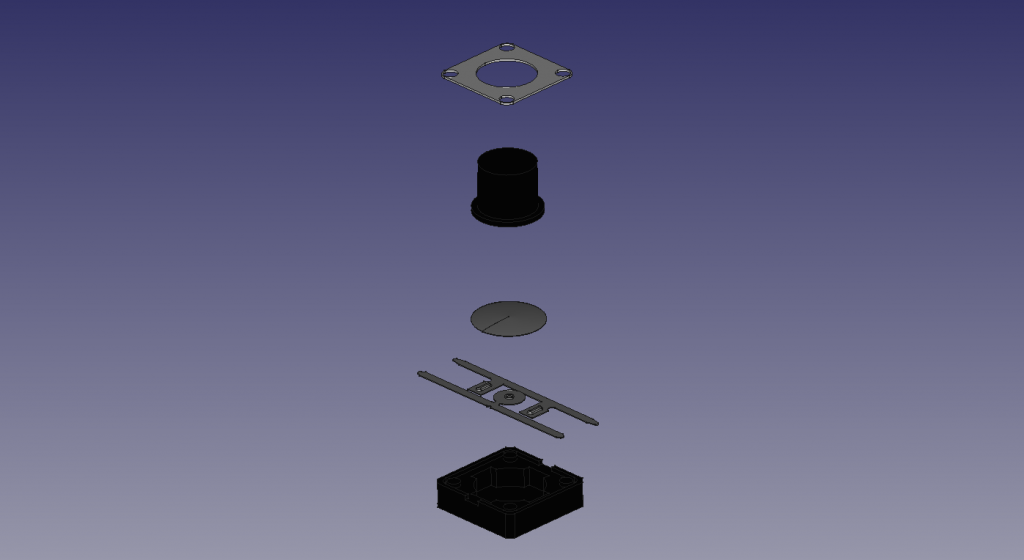
figure 2
Pull Down Resistor
A Pull Down Resistor is used on this project to set the “default value” of the Pin on the Arduino. When you desing a circuit you can use a PullDown or a PullUp resistor. The PullDown is a resistor that connects the pin to ground “pulls” the voltage of the pin to Ground. Conceptually it sets the value of the pin to Zero or False. It is therefare a good way to think of it as setting the dfault value to Zero or False.
A PullUp Resistor does to the inverse. The pullup resistor connectors the pin of the Arduino to 5 Volts or 3.3 Volts , dpending on which you are using, to set the default value to One or True.
Materials
- Arduino UNO
- 1 – 5mm LEDs
- 1 – Momentary Pushbutton
- Hookup Wire
- Jumper Wires
- Breadboard
Coding Directions
Copy the following code into a new sketch. Double check to make certain the PIN assignments match your wiring.
int BUTTON_PIN = 7;
int LED_PIN = 13;
boolean buttonState;

void setup() {
  pinMode( BUTTON_PIN, INPUT );
  pinMode( LED_PIN, OUTPUT );
}

void loop(){

  buttonState  = digitalRead( BUTTON_PIN );

  if ( buttonState )  {
    digitalWrite( LED_PIN, HIGH );
  } else {
    digitalWrite( LED_PIN, LOW );
  }
}
Wiring Directions
Support Our work

Follow or Support on Patreon at

Purchase Posters/ Worksheets and 3d Models on