If you want details from the source, the library we are using here is fully documented at https://rplcd.readthedocs.io/en/stable/
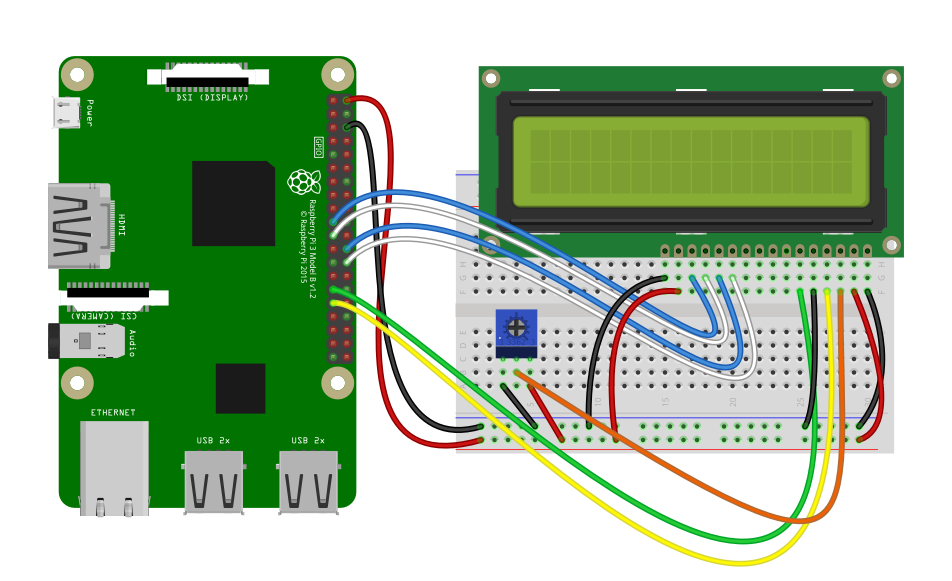
The Fritzing Diagram can be helpful in wiring up the Pi and the LCD, Fristzing contain pin identifications if you hover over the pin.
The Bare Minimum to get a message on Screen
Wire the Components
The Wiring for the Python version of code is the same as the NodeRED version. Follow the wiring section on that post and return here for the code.
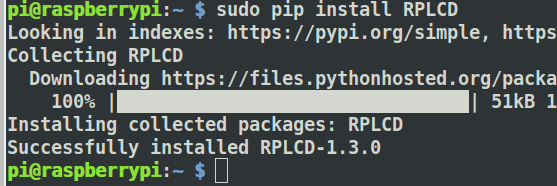
Get The Library
$ sudo pip install RPLCD

Coding Python
The beauty of coding for hardware like an LCD on the Raspberry Pi is that the code is already present where it will be executing. There is no need to compile and upload for a Python Script.
If you prefer to code on your desktop it as simple as copying the resulting Python file to your Raspberry Pi.
For this activity we will be coding in the bash shell via an ssh connection.
ssh pi@192.168.13.14
nano pi_lcd.py
Define the pins that will be used
We will use simple variables to define each of the pins connecting the LCD to the Pi. They could be more abbreviated but to help with clarity we will use longer names.
ENABLE = 31
REGISTER_SELECT = 29
DATA_PIN_D7 = 26
DATA_PIN_D6 = 24
DATA_PIN_D5 = 21
DATA_PIN_D4 = 19
Let’s create any LCD Object using the VAriables we setup above. The RPLCD library does all the hard work all we need to do is import the library and then create an “instance”.
First import the Library
from RPLCD.gpio import CharLCD
Now using the variables we set up earlier we will create the LCD object. The CharLCD class uses keyword args for input. So each argument is a keyword and the value being assigned.
my_lcd = CharLCD(cols=16, rows=2, pin_rs=REGISTER_SELECT, pin_e=ENABLE, pins_data=[DATA_PIN_D7,DATA_PIN_D6,DATA_PIN_D5,DATA_PIN_D4]
That’s all we need, add a line with what text you want to display and you are good to go.
my_lcd.write(u'Message of Hope')
